

Connect Amazon
Connect your Amazon seller account and every buyer message arrives in Replyco as a ticket, with the order beside it; the replies you send from Replyco go back to the buyer through Amazon. The connection has two parts: you allow Replyco to read your seller account in Seller Central, and you give Amazon an email address that Replyco provides, so that buyer messages reach Replyco. It takes about ten minutes.
Before you start
Section titled “Before you start”| You need | Where it lives |
|---|---|
| The Admin permission in Replyco | AdminUsers; see Invite users and set what they can do |
| A Seller Central login with admin rights for the store | Amazon Seller Central |
| The country your store sells in | Seller Central › Settings › Account Info |
| A free account on your plan | AdminBilling; see Billing |
Availability: every plan. One Amazon seller account can be connected once per region (Europe, North America, Brazil, and Australia with the Far East).
-
Select + Add Account in the top bar.
The Add Account page opens with one tile per marketplace, followed by Mailbox Accounts, Order Management System Accounts and Social Media and Phone Accounts. To connect another marketplace, a mailbox or a messenger instead, see Accounts and integrations.
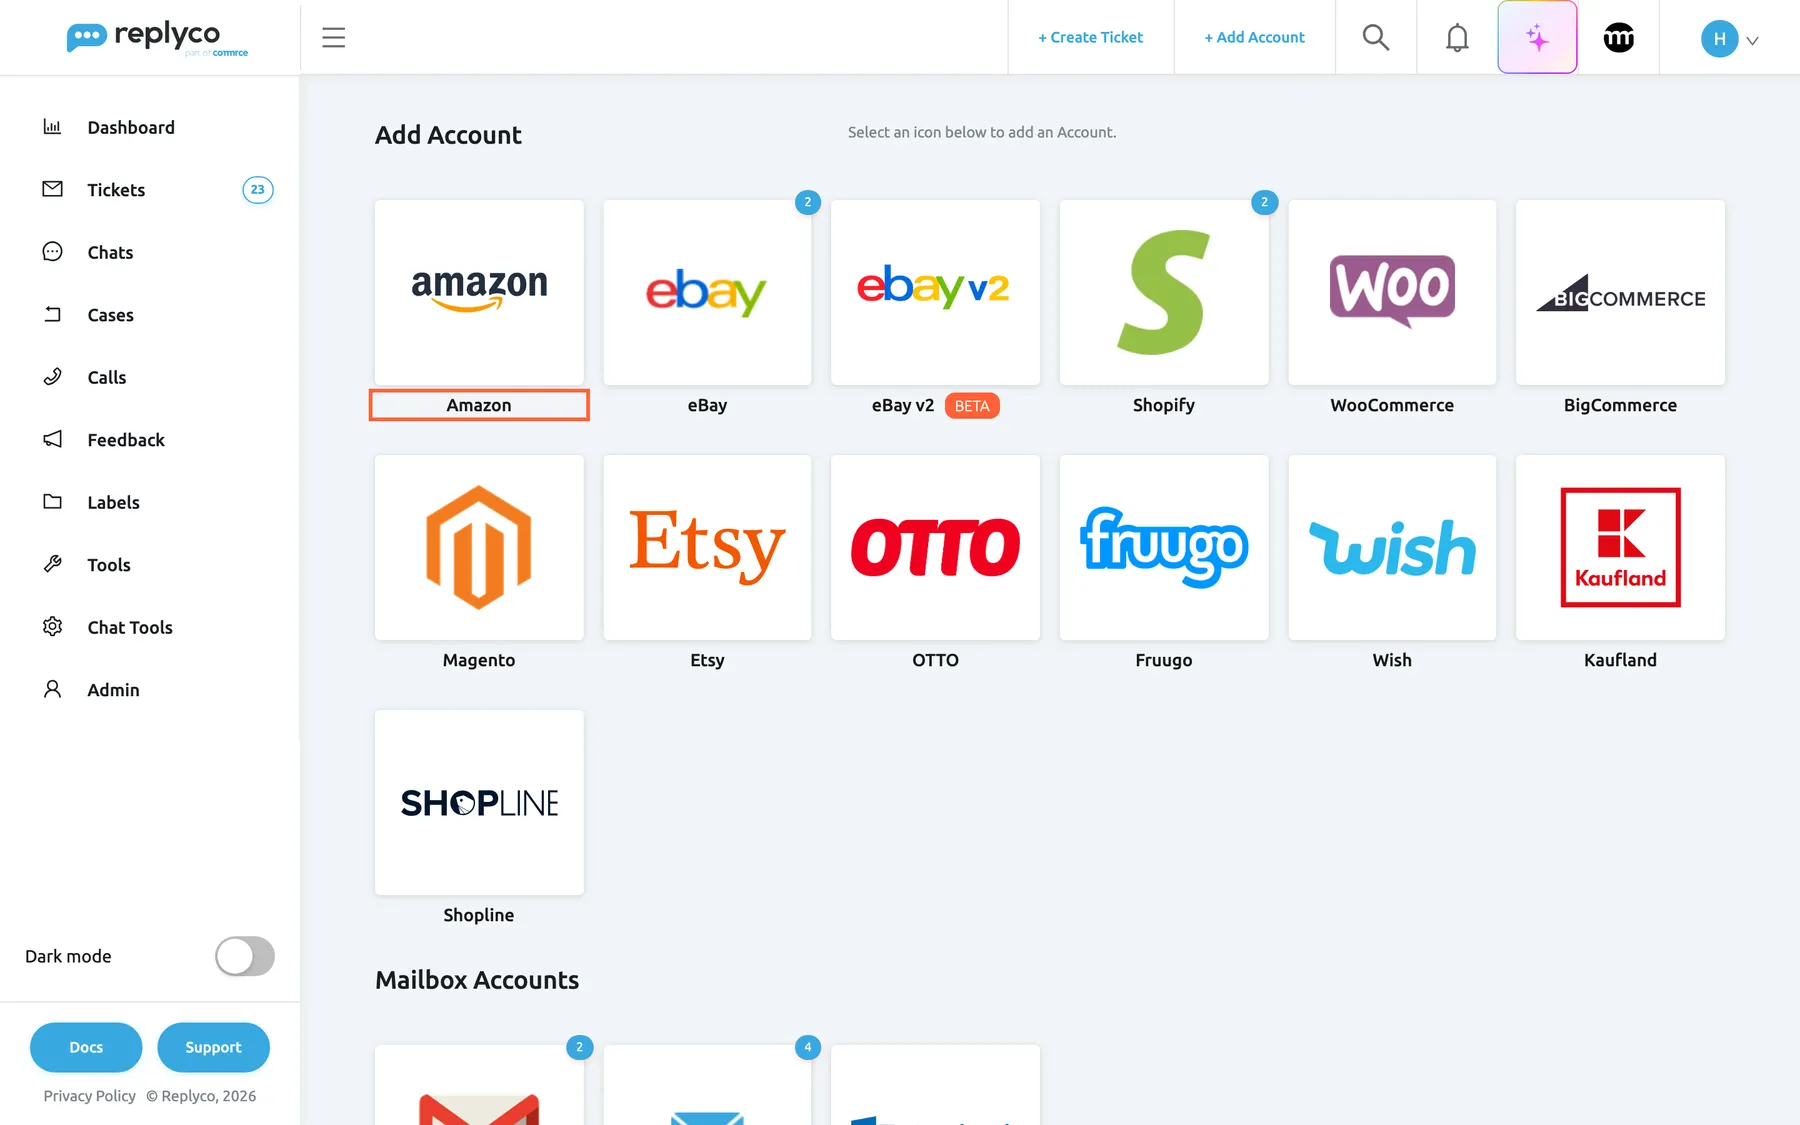
Every channel Replyco connects has a tile; Amazon is the first marketplace. What this screenshot shows
- Screen
- Add Account (/integrations/add)
- Highlighted
- button “”, marketplace-tiles, enabled. opens the Amazon authorisation dialog
- Also visible
- marketplace tiles; Mailbox Accounts heading
- Purpose
- start connecting Amazon
-
Select the Amazon tile, then choose your country in Select Shop Country.
The countries are the United Kingdom, United States, Canada, Mexico, Brazil, Spain, France, the Netherlands, Germany, Italy, Sweden, Poland, Turkey, the United Arab Emirates, India, Singapore, Australia and Japan. Replyco uses the country to open the Seller Central site of your region.
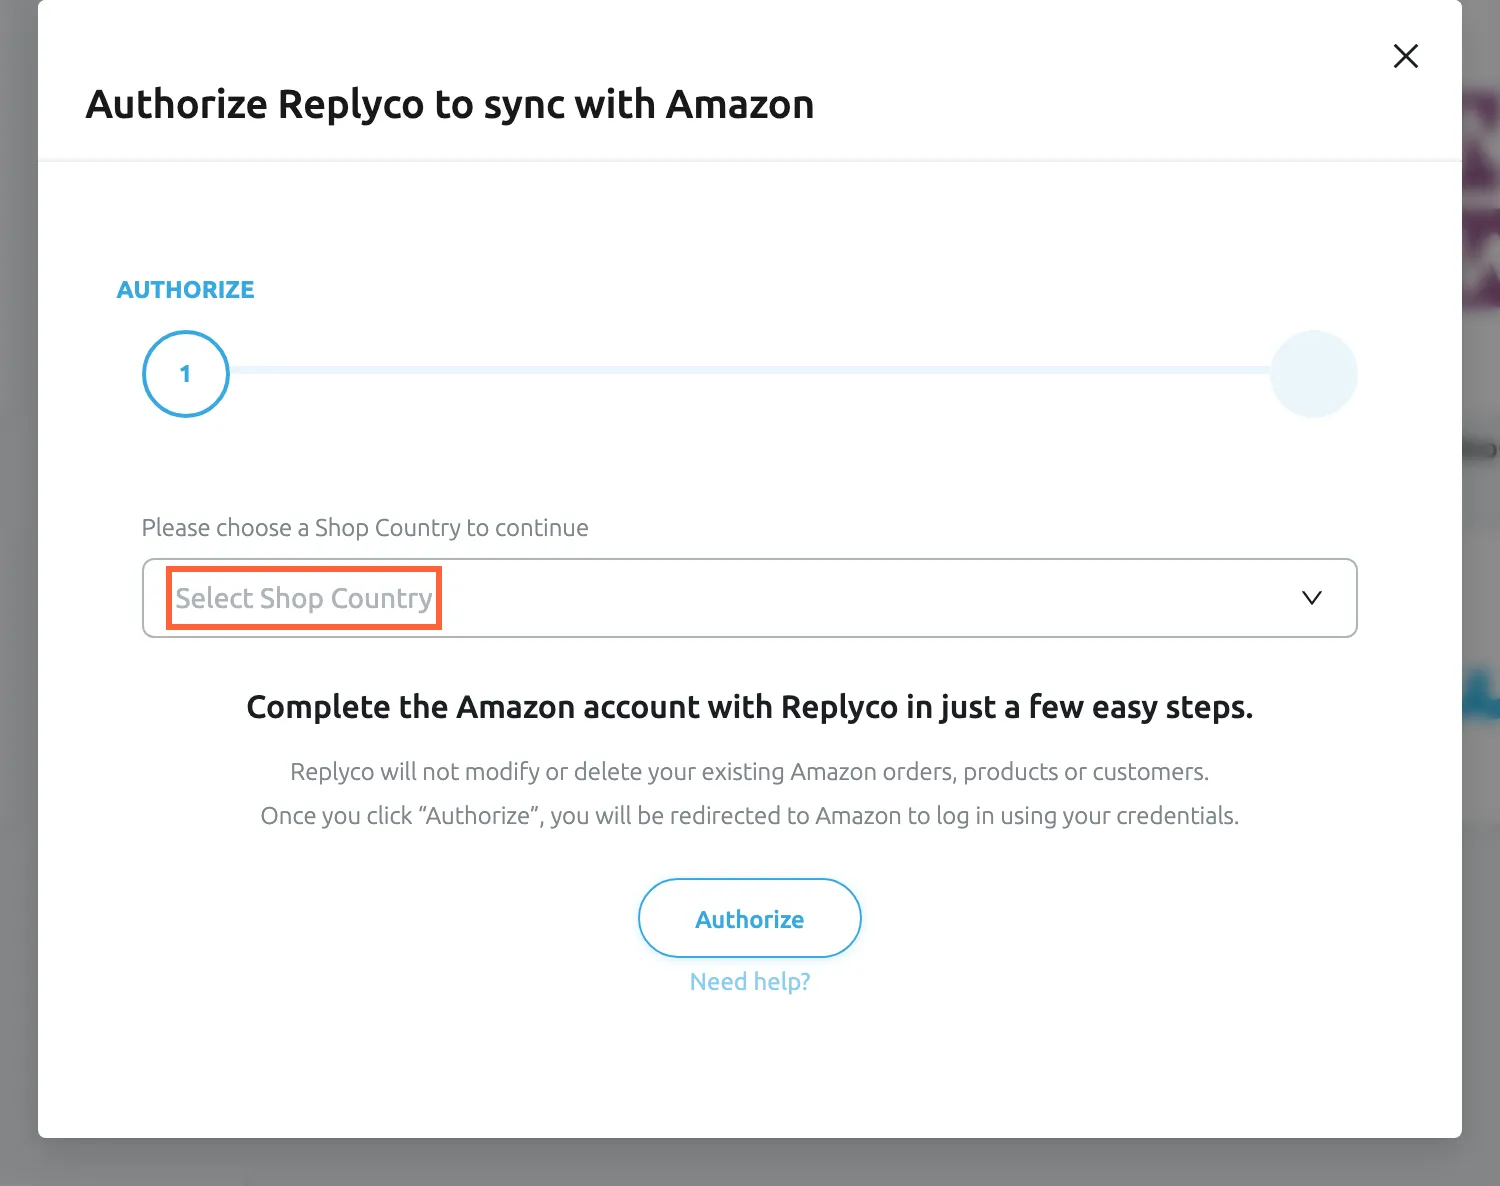
Choose the country your store sells in; Replyco opens the Seller Central site of that region. What this screenshot shows
- Screen
- Add Account (/integrations/add)
- Highlighted
- combobox “Select Shop Country”, dialog, empty. lists the Amazon countries
- Also visible
- step AUTHORIZE; Authorize button; Need help? link
- Purpose
- choose the Amazon region
-
Select Authorize. Seller Central opens in a new browser tab; sign in and approve Replyco’s access.
Stay in the new tab: the Replyco tab you started from keeps showing the country choice, and the account is saved only in the next step, after Amazon sends you back.
On Amazon’s authorisation page, which lists the data of your seller account the application may use, tick the check box that directs Amazon to give the application access, then select Confirm. If you are already signed in to Seller Central, Amazon goes straight to this page.
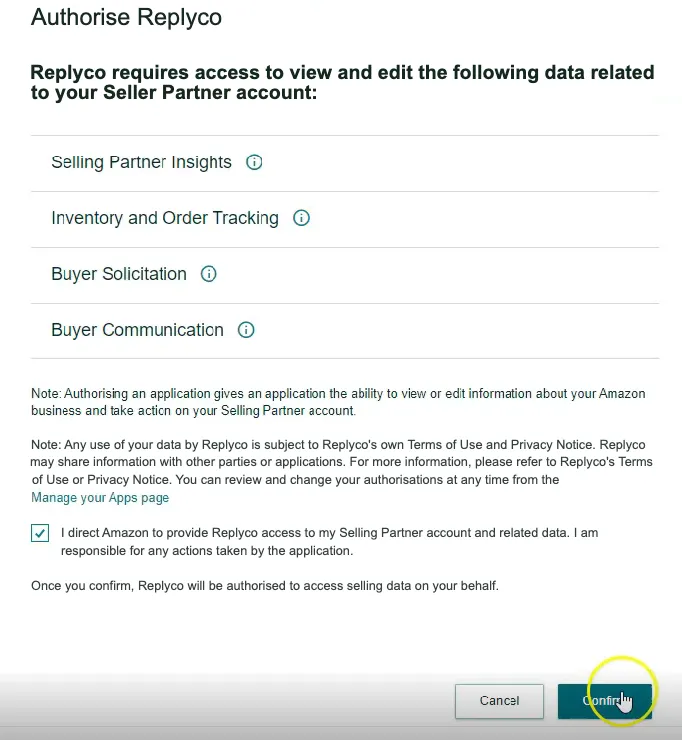
Tick the check box and select Confirm to give Replyco access to your seller account. What this screenshot shows
- Screen
- ()
- Highlighted
- “”, , .
- Also visible
- Selling Partner Insights; Inventory and Order Tracking; Buyer Solicitation; Buyer Communication; consent check box, ticked; Cancel and Confirm buttons
- Purpose
-
After you approve, Amazon returns you to Replyco, which shows Almost done.... Enter an Account Name, and optionally the name your replies are sent as in Send Name as, then select Authorize.
Choose an account name your team recognises, for example your store and region; it labels every ticket from this account.
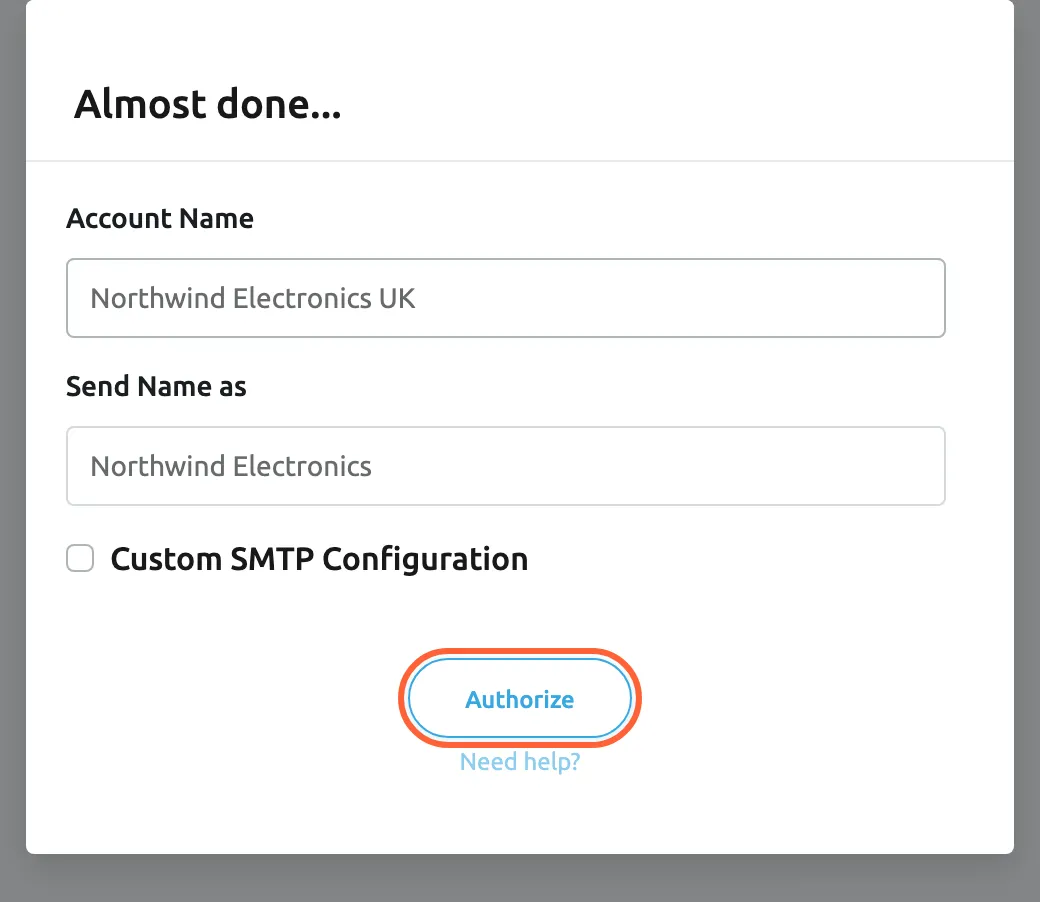
Name the account the way your team will recognise it; the account is saved when you select Authorize here. What this screenshot shows
- Screen
- Almost done... (/integrations/amazon/success)
- Highlighted
- button “Authorize”, dialog-bottom, enabled. saves the Amazon account
- Also visible
- Account Name: Northwind Electronics UK; Send Name as: Northwind Electronics; Custom SMTP Configuration unticked
- Purpose
- save the Amazon account
-
Select Copy Email Address to copy the address Replyco created for this account, then select Done.
You need the address in the next step. You can copy it again at any time from the account’s details under Setup Email Forwarding:.
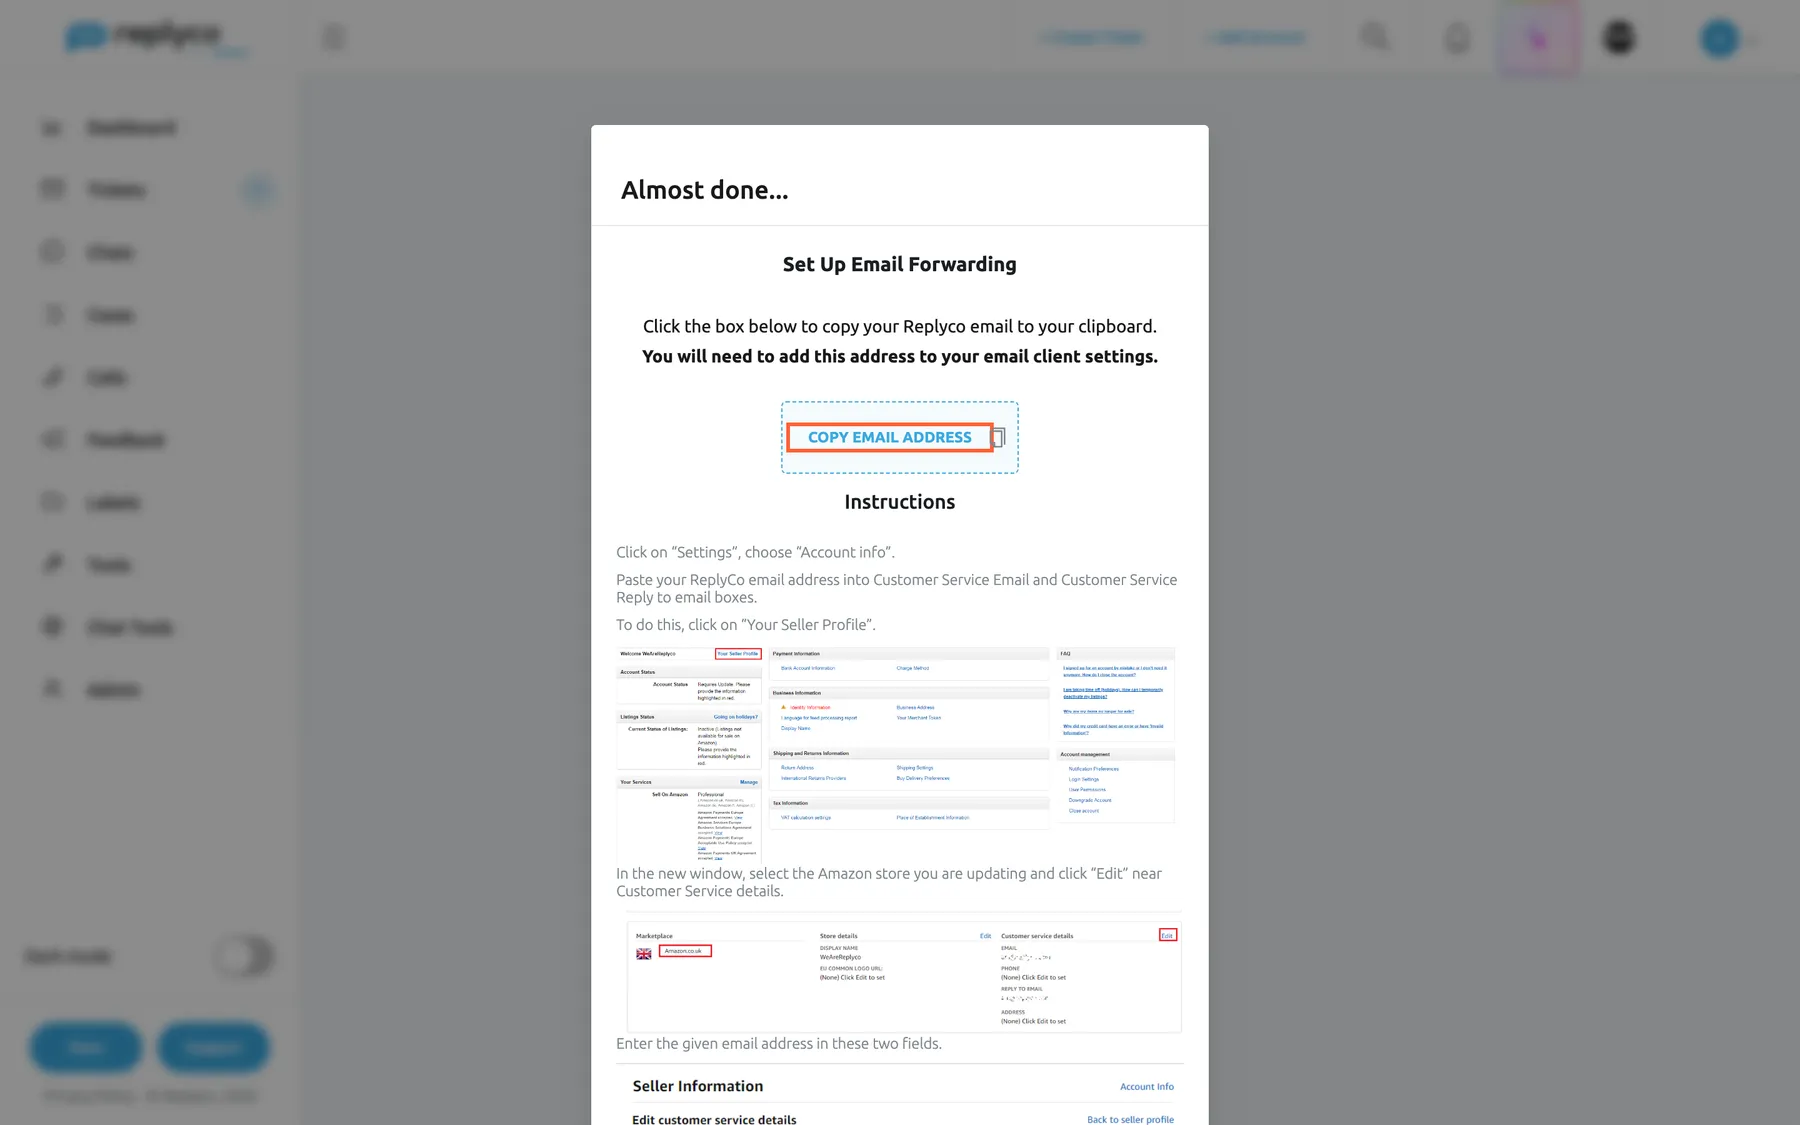
Copy the Replyco address now; you enter it in Seller Central in the next steps. What this screenshot shows
- Screen
- Almost done... (/integrations/amazon/success)
- Highlighted
- button “Copy Email Address”, dialog, enabled. copies the account's Replyco address
- Also visible
- Set Up Email Forwarding instructions; Done button
- Purpose
- copy the address Amazon will send messages to
-
In Seller Central, open Settings › Account Info › Your Seller Profile, select Edit next to the customer service details, and paste the address into both the customer service email and the customer service reply-to email. Select Submit.
Your Seller Profile lists each marketplace you sell on separately, for example Amazon.co.uk and Amazon.de. Repeat this for every marketplace of the region, with the same Replyco address: one connection covers all the countries of its region.
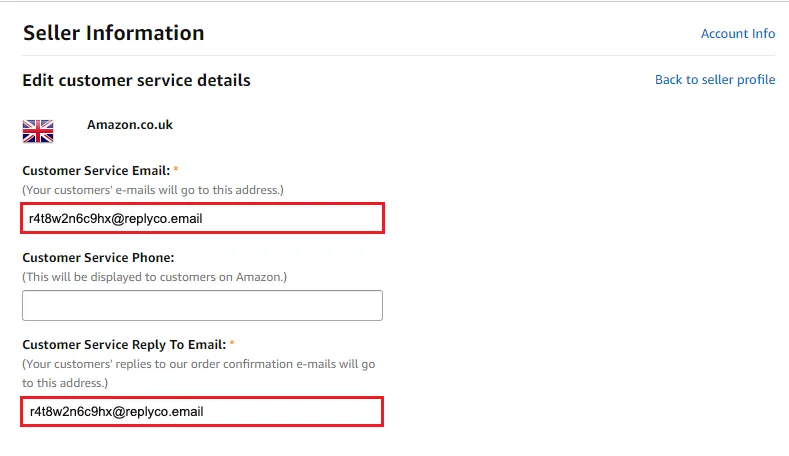
Put the Replyco address into both customer service email fields, for each marketplace you sell on. What this screenshot shows
- Screen
- ()
- Highlighted
- “”, , .
- Also visible
- marketplace Amazon.co.uk; Customer Service Email with the Replyco address; Customer Service Phone; Customer Service Reply To Email with the Replyco address
- Purpose
-
(Optional, recommended by Replyco) In Seller Central, open Settings › Notification Preferences, go to Messaging and select Edit. Under each message type, such as Buyer Messages and Confirmation Notifications, select Add another and paste the same address into the new box; keep the addresses that are already there. Select Save.
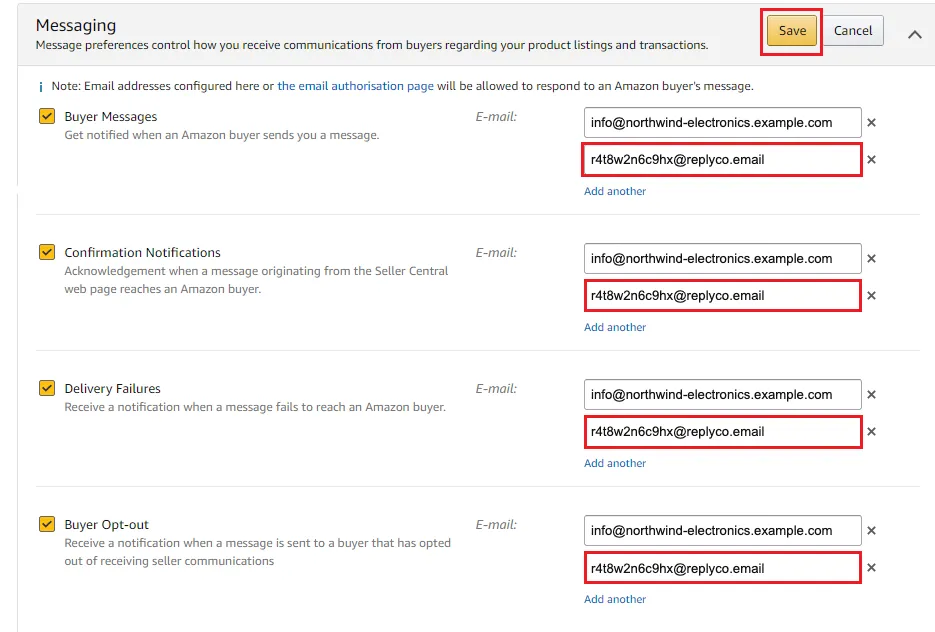
Add the Replyco address as a second address for each message type, then save. What this screenshot shows
- Screen
- ()
- Highlighted
- “”, , .
- Also visible
- Buyer Messages; Confirmation Notifications; Delivery Failures; Buyer Opt-out; Add another links; Save and Cancel buttons
- Purpose
-
In Seller Central, open Orders › Order Reports, choose to add or remove order report columns, and turn on every optional column.
Replyco requires every optional column to be on.
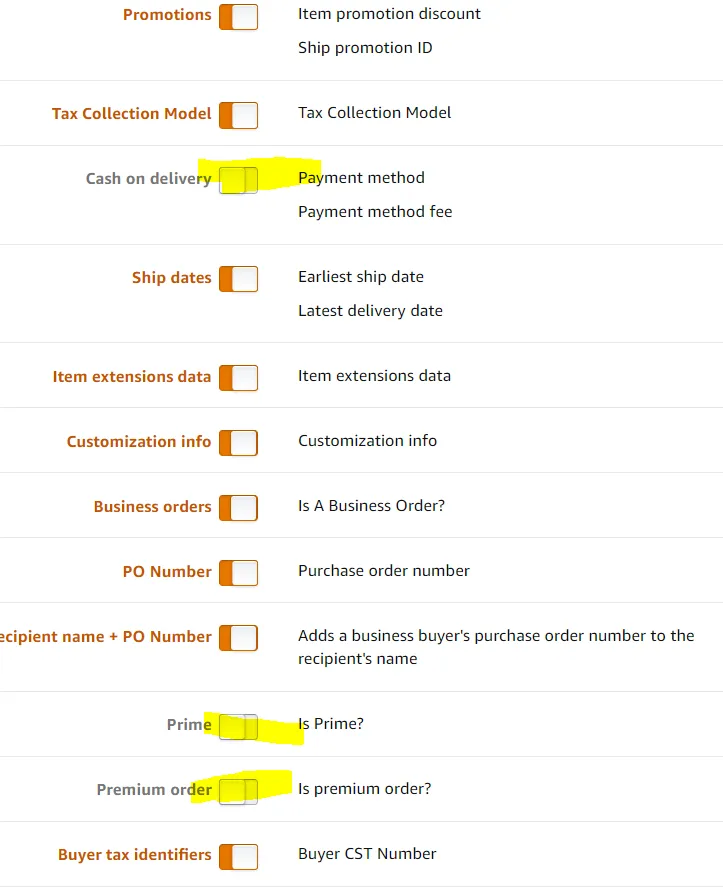
Every optional column must be on; switch on any that are still off. What this screenshot shows
- Screen
- ()
- Highlighted
- “”, , .
- Also visible
- optional column switches; Cash on delivery, Prime and Premium order still off, marked
- Purpose
What happens next
Section titled “What happens next”The account appears on AdminAccounts and starts to sync at once; to check how its sync is going, see Accounts. Replyco imports your orders from the last two days and then checks Amazon for new orders every few minutes. Buyer messages arrive only after you have entered the Replyco address in Seller Central: Amazon sends new messages to that address from then on, and earlier messages are not imported. When the next buyer message arrives, check that a ticket appears in TicketsNot Resolved. To reply to it, see Answer a ticket.
If something goes wrong
Section titled “If something goes wrong”| Symptom | Check | Fix |
|---|---|---|
| Please select Shop Country to continue. | No country was chosen. | Choose the country, then select Authorize again. |
| “You have already added an account for that region.” | This seller account is already connected for the same region. | Use the existing account on AdminAccounts; each region needs only one connection. |
| The account is connected but no buyer messages arrive | Seller Central › Settings › Account Info › Your Seller Profile: is the Replyco address in both customer service email boxes? | Paste the address again from the account’s details and save in Seller Central. |
| The account shows Blocked | Amazon no longer accepts Replyco’s access. | See Fix a blocked or silent account. |