

Invite users and set what they can do
Invite a colleague and they get their own Replyco user: Replyco e-mails them an invitation, they set a password, and they start with the access of the role you chose. Afterwards you can narrow or widen what they see, list by list and account by account, so an agent who answers only marketplace customers sees only those tickets. To register, your colleague needs their phone at hand for two-factor authentication, which is mandatory for every new user. To prepare a whole team, with accounts, labels and automation, see Set up Replyco for your team.
Before you start
Section titled “Before you start”| You need | Where it lives |
|---|---|
| The Admin permission, which shows Users in the Admin menu | AdminUsers; see User permissions and roles |
| User roles and permissions, part of every current plan | Companies on an older plan may not have them; see What each plan includes |
| Your colleague’s name and work e-mail address, not used by any other Replyco user | Your team |
| An idea of what they should see: which ticket lists, labels and accounts | Your team’s way of working; see Ticket lists |
| For your colleague: a phone with an authenticator app | Needed when they register; see Two-factor authentication |
Availability: every plan includes the Users screen, user roles and Access Rights, and so does every trial. If your plan is priced per user, each invitation changes the price at once; see Billing.
-
Open AdminUsers and select Invite User at the top right.
The form Invite User opens.
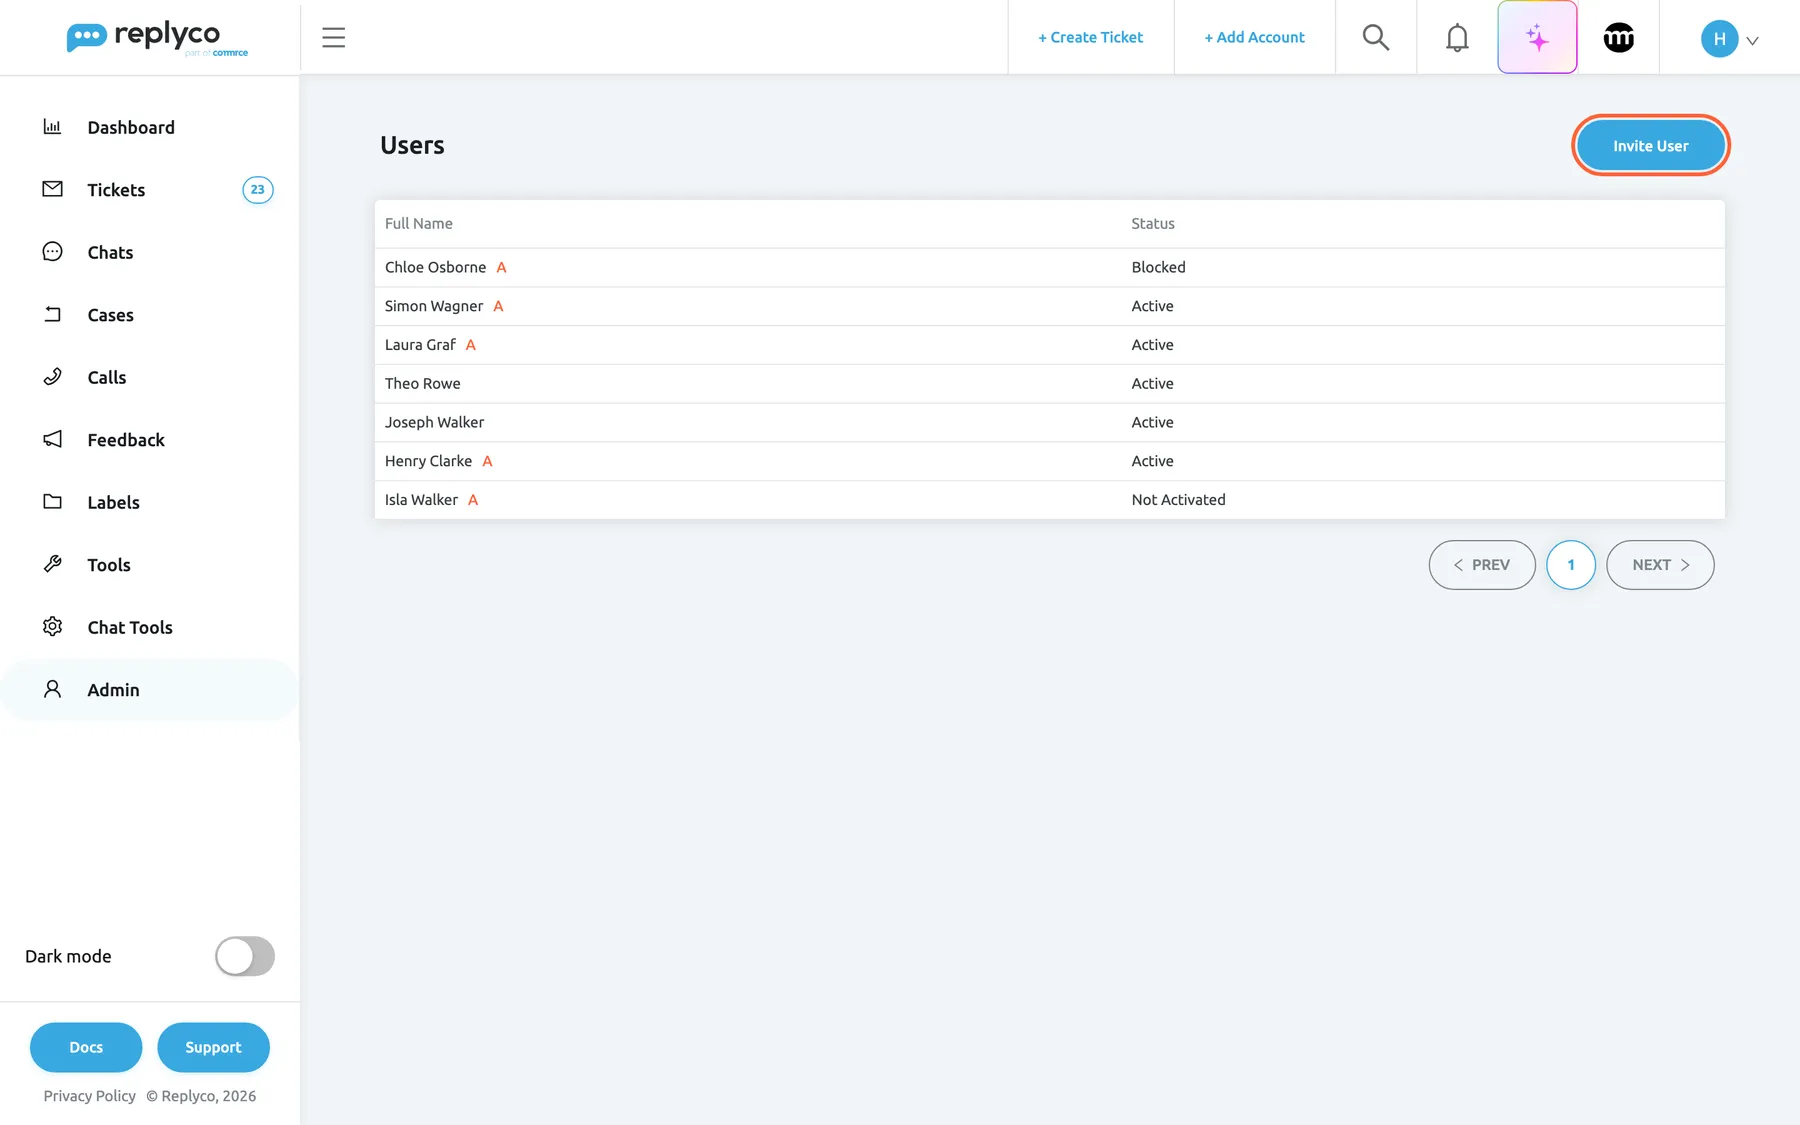
Start from Admin › Users and select Invite User. What this screenshot shows
- Screen
- Users (/users)
- Highlighted
- button “Invite User”, top-right, enabled. opens the Invite User form
- Also visible
- 7 users with status; red A after administrators
- Purpose
- entry point of the invitation
-
Fill in Name, Last Name and Email, for example Maya, Collins and maya.collins@example.com. Add a number under Mobile if you like; it is the only optional field.
-
Check Message language, the language Replyco translates customer messages into when your colleague selects the translate icon, and Default Message View; see Translations.
-
Choose the User Role: Admin, Moderator or User.
User is preselected and suits agents; the information icon beside the drop-down describes each role. The role sets your colleague’s permissions, ticket lists and dashboards; see Options.
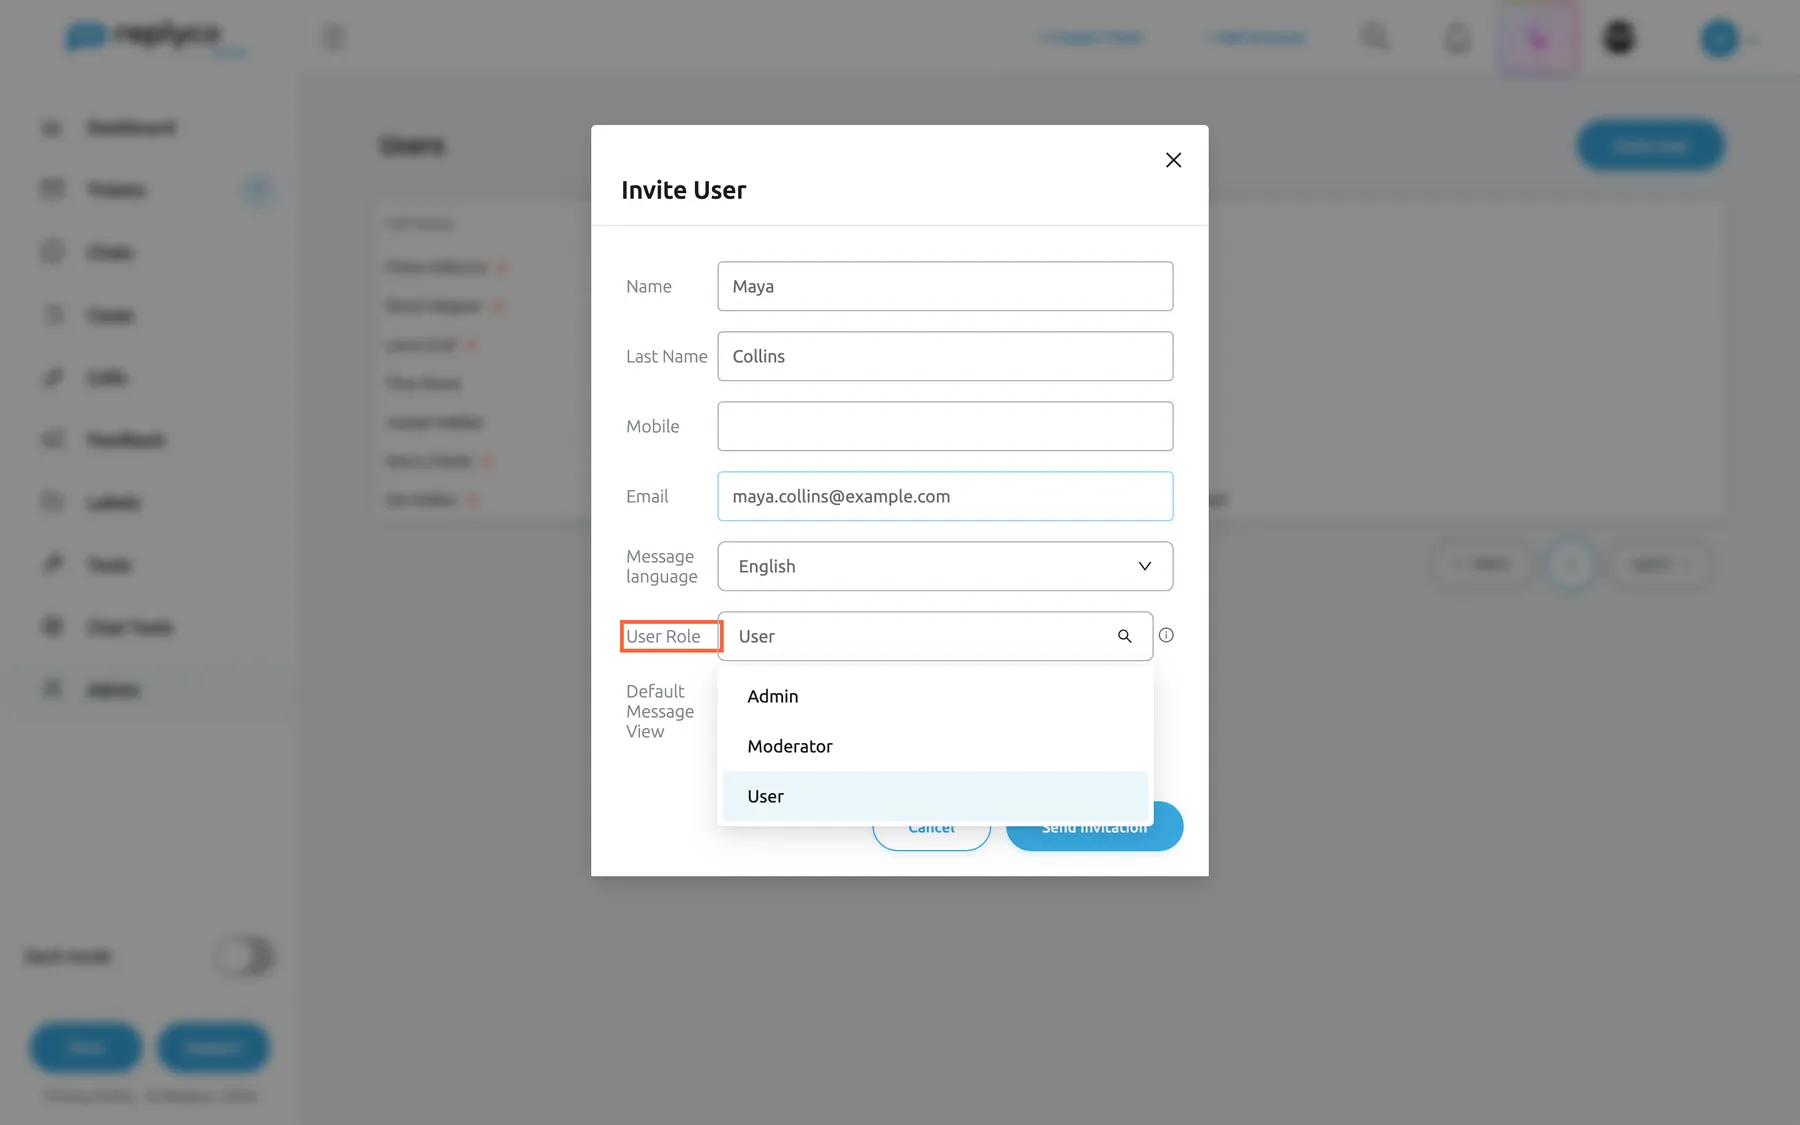
Fill in name, last name and e-mail, then pick the role that fits the colleague's job. What this screenshot shows
- Screen
- Invite User (/users)
- Highlighted
- “”, dialog, open. offers Admin, Moderator and User
- Also visible
- Name Maya, Last Name Collins, Email maya.collins@example.com; role options Admin, Moderator, User; Send Invitation
- Purpose
- choose the role of the new colleague
-
Select Send Invitation, then Yes in the question that appears.
On a plan priced per user, the question is Adding a new user will immediately adjust your subscription price. The updated cost will take effect and be reflected in your next invoice. If you pay through Shopify, Replyco also opens Shopify in a new tab to approve the new price.
-
Replyco sends the invitation e-mail and shows the registration link. Select Copy if you want to send the link yourself as well, for example in your team chat, then close the dialog.
Your colleague now appears in the list with the status Not Activated.
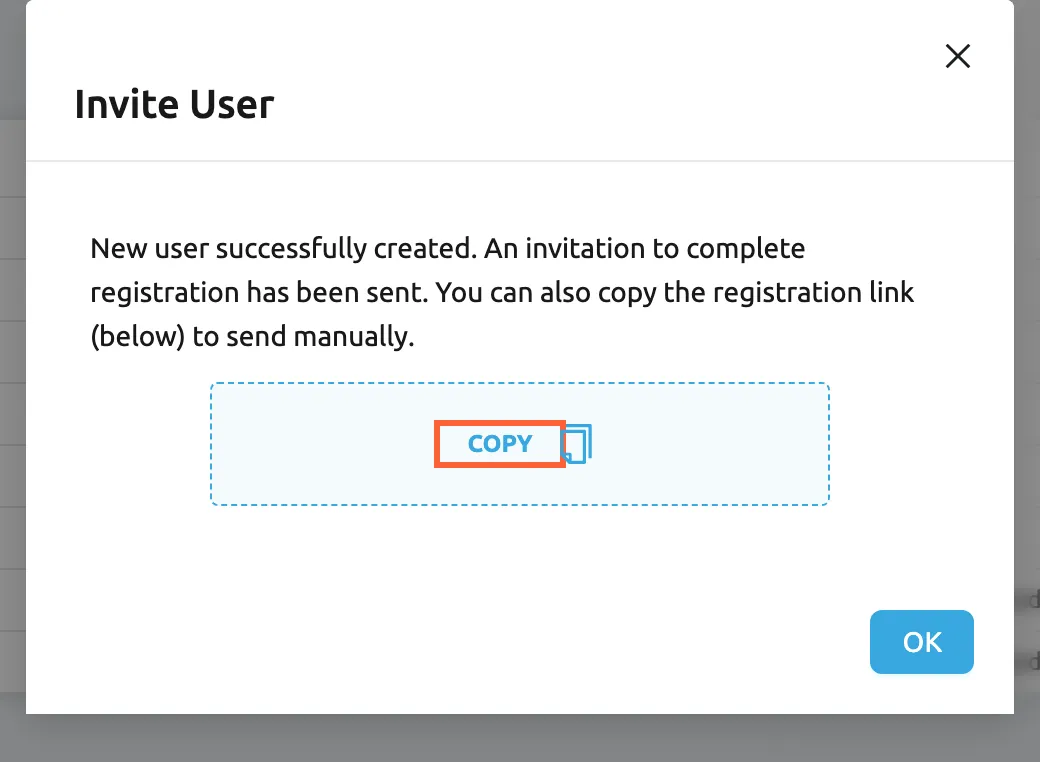
The invitation e-mail is sent; copy the link too if the colleague should get it another way. What this screenshot shows
- Screen
- Invite User (/users)
- Highlighted
- “”, dialog-body, enabled. copies the registration link
- Also visible
- confirmation that the invitation was sent; Copy box; OK
- Purpose
- the invitation is sent
-
(Optional) Select your colleague in the list, open Access Rights, open the sections you want to change, tick or clear boxes and select Save.
Replyco confirms with Permissions have been updated. For example, to show only the marketplace tickets, clear the webstore and mailbox accounts in Tickets Accounts; to keep a label private, clear it in Labels. Every section is explained in Users.
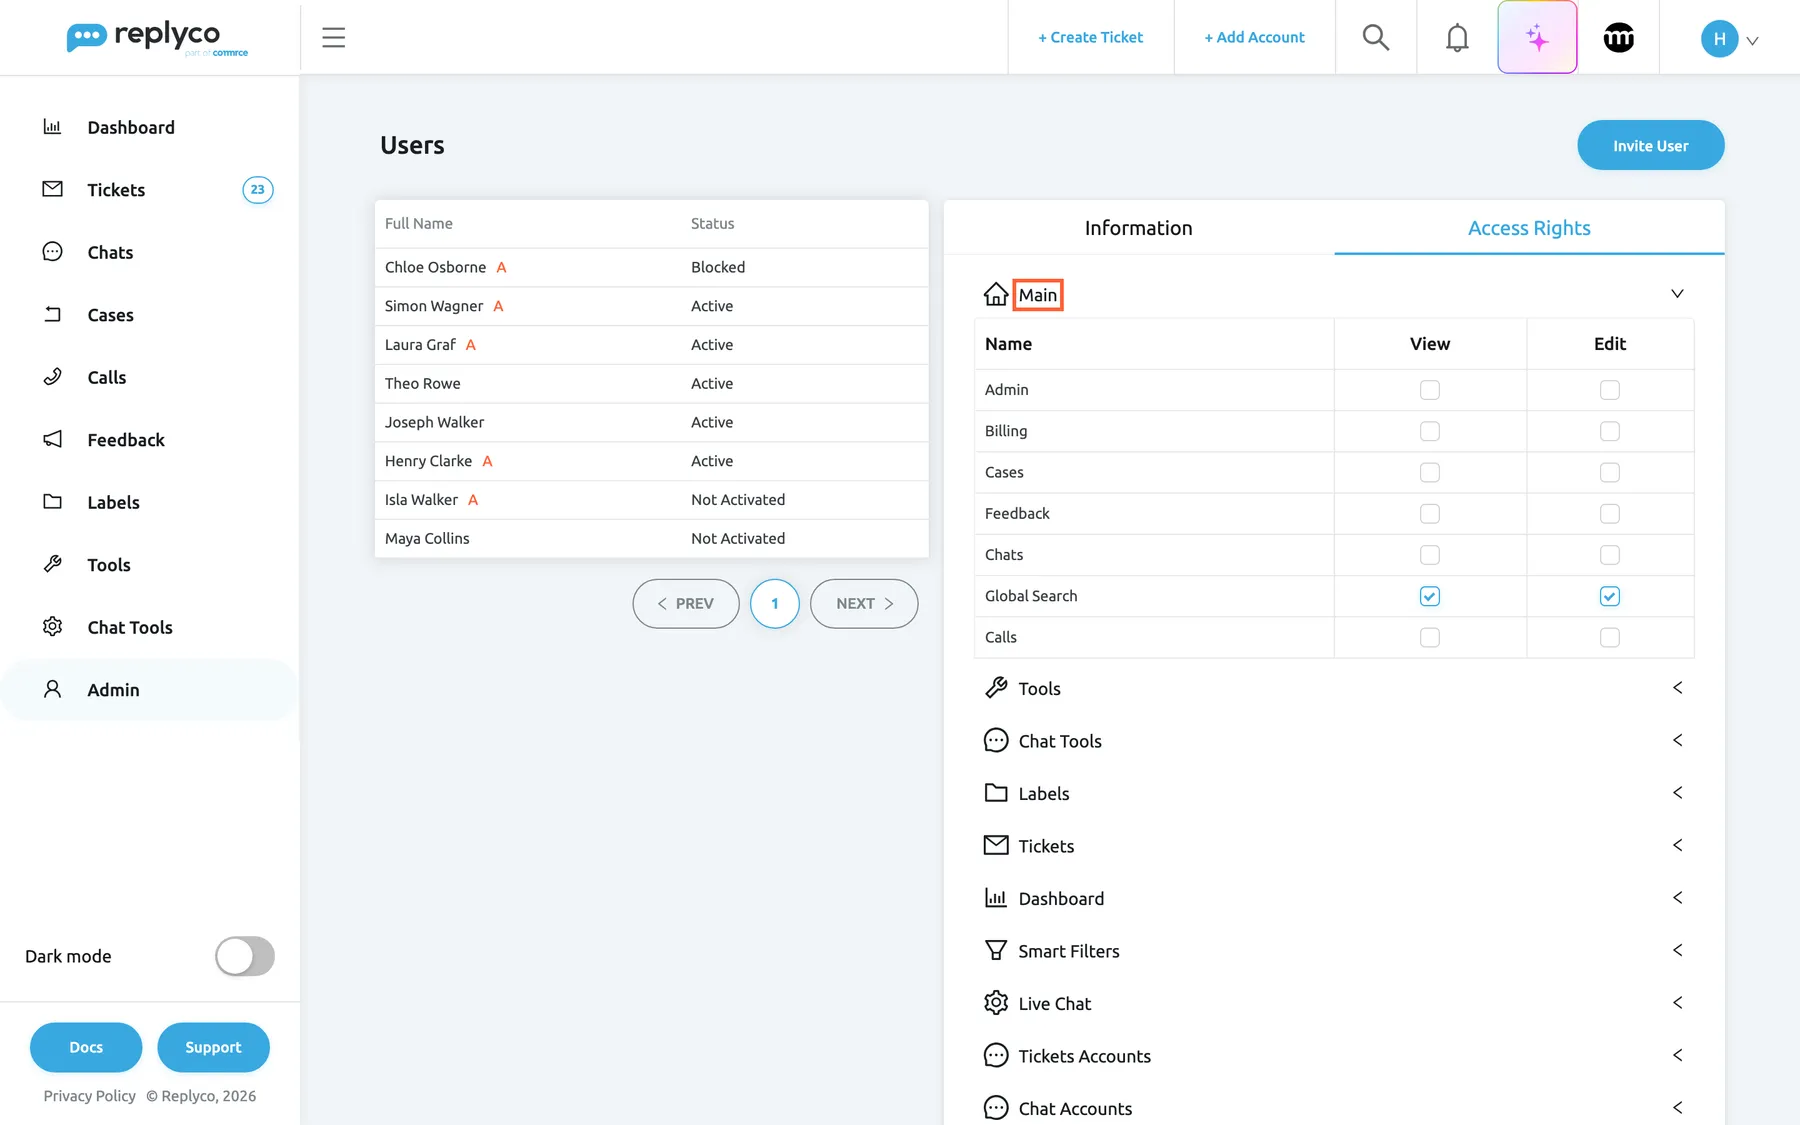
Fine-tune a new colleague on Access Rights; the role only set the starting point. What this screenshot shows
- Screen
- Access Rights (/users)
- Highlighted
- “”, access-rights-main, expanded. shows the Main permissions with View and Edit
- Also visible
- Maya Collins Not Activated; only Global Search ticked; other sections collapsed
- Purpose
- adjust what the new colleague can do
-
Ask your colleague to open the e-mail Invite to Replyco and select its button.
It opens a sign-in screen that reads You've been invited to join! Login to finish your registration. There they enter their address, create a password and set up two-factor authentication with an authenticator app; see Sign in.
What happens next
Section titled “What happens next”As soon as your colleague has registered, their status in AdminUsers changes from Not Activated to Active, and they can sign in. They start with the permissions, ticket lists and dashboards of their role, every label, Replyco’s default Smart Filters and every connected account, unless you changed that on their Access Rights. My Tickets is always among their lists.
To check that it worked, ask them to open Tickets: the lists you ticked appear there, and only tickets of the accounts and labels you allowed. When you change their access later, they see it the next time Replyco loads for them, for example after reloading the page. The settings that apply to everyone, such as working time and automatic assignment on reply, are set once for the whole company; see Company Settings.
Labels, Smart Filters and accounts you add later are given to every user, your new colleague included; clear them on their Access Rights if they should not see them.
Options
Section titled “Options”| Choice | When to pick it | Effect |
|---|---|---|
| Role User | Agents who answer customers | Full access to tickets and labels, customers, orders and products among the tools, the Overview dashboard and the global search |
| Role Moderator | Team leads who also run tools and automation | Limited only in the main areas, where cases, feedback, chats and the global search are available |
| Role Admin | People who manage users, settings and billing | Full access rights, including the Admin menu |
| A role, then Access Rights | Someone whose job fits no role exactly | The role is the starting point; the drop-down then shows Custom |
For what each permission opens in the menu, see User permissions and roles.
If something goes wrong
Section titled “If something goes wrong”| Symptom | Check | Fix |
|---|---|---|
| All fields required. | Name, Last Name or Email is empty | Fill in all three and send again |
| User Email is invalid. | The address has a typing error | Correct it and send again |
| “Email address is disabled!” | The address is a disposable address | Use your colleague’s regular work address |
| The invitation cannot be sent for an address | The address already belongs to a Replyco user, for example from an earlier sign-up of their own | Use another address. If you need this one, contact support about the other sign-up; see Help and support |
| Your colleague did not get the e-mail | Their junk folder, and the address in their details on AdminUsers | Select them in the list and use Copy invite link to send the link yourself |
| Your colleague sees too much or too little | Their Access Rights: Tickets Accounts, Labels, Tickets | Change the sections, select Save and ask them to reload Replyco |
| Users is missing from your Admin menu | Your permissions | Ask an administrator for the Admin permission; companies on an older plan may not have the screen, see What each plan includes |