

Connect TikTok Shop
Connect your TikTok Shop and the conversations buyers start with your shop arrive in Replyco as chats; your replies go back to the buyer in TikTok Shop. The connection is a seller authorisation: you sign in to TikTok Shop with your seller account and allow Replyco access, and Replyco adds one account for each shop the authorisation covers, named after the shop. The TikTok tile carries the BETA label because the connection is still in beta; you connect it like any other channel.
Before you start
Section titled “Before you start”| You need | Where it lives |
|---|---|
| The Admin permission in Replyco | AdminUsers; see Invite users and set what they can do |
| The login of your TikTok Shop seller account; TikTok Shop lets the main account authorise services, not sub-accounts | TikTok Shop Seller Center |
| A free account on your plan for each shop | AdminBilling; see Billing |
Availability: every plan.
-
Select + Add Account in the top bar and scroll down to Social Media and Phone Accounts.
The Add Account page lists every channel Replyco connects; to connect another one, see Add Account.
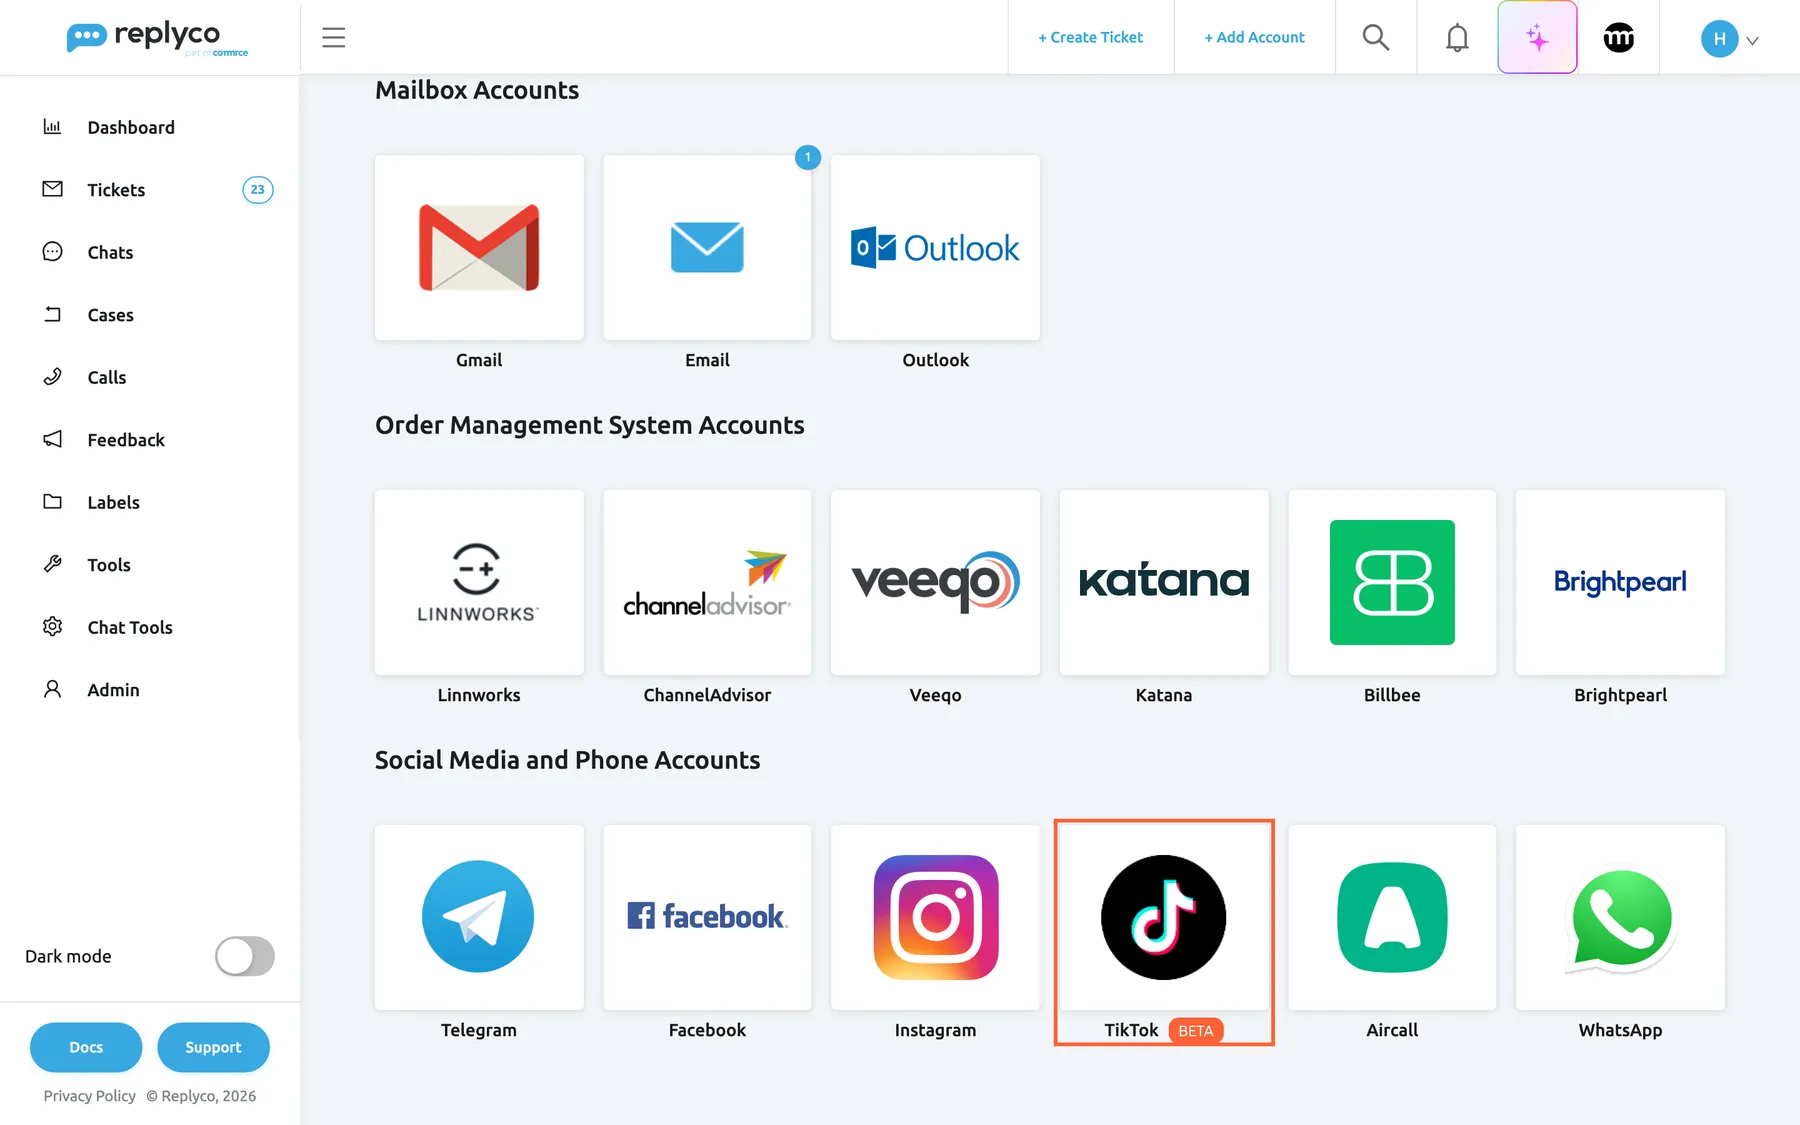
TikTok Shop is connected with the TikTok tile, marked BETA, under Social Media and Phone Accounts. What this screenshot shows
- Screen
- Add Account (/integrations/add)
- Highlighted
- button “”, social-media-and-phone-tiles, enabled. opens the TikTok connect dialog
- Also visible
- Mailbox Accounts and Order Management System Accounts above; Telegram, Facebook, Instagram, TikTok (BETA), Aircall, WhatsApp tiles
- Purpose
- start connecting TikTok Shop
-
Select the TikTok tile. The dialog Authorize Replyco to sync with TikTok opens at its first step, AUTHORIZE. Select Authorize.
TikTok Shop’s authorisation page opens in a new browser tab. The dialog in the tab you started from moves on to FINISH.
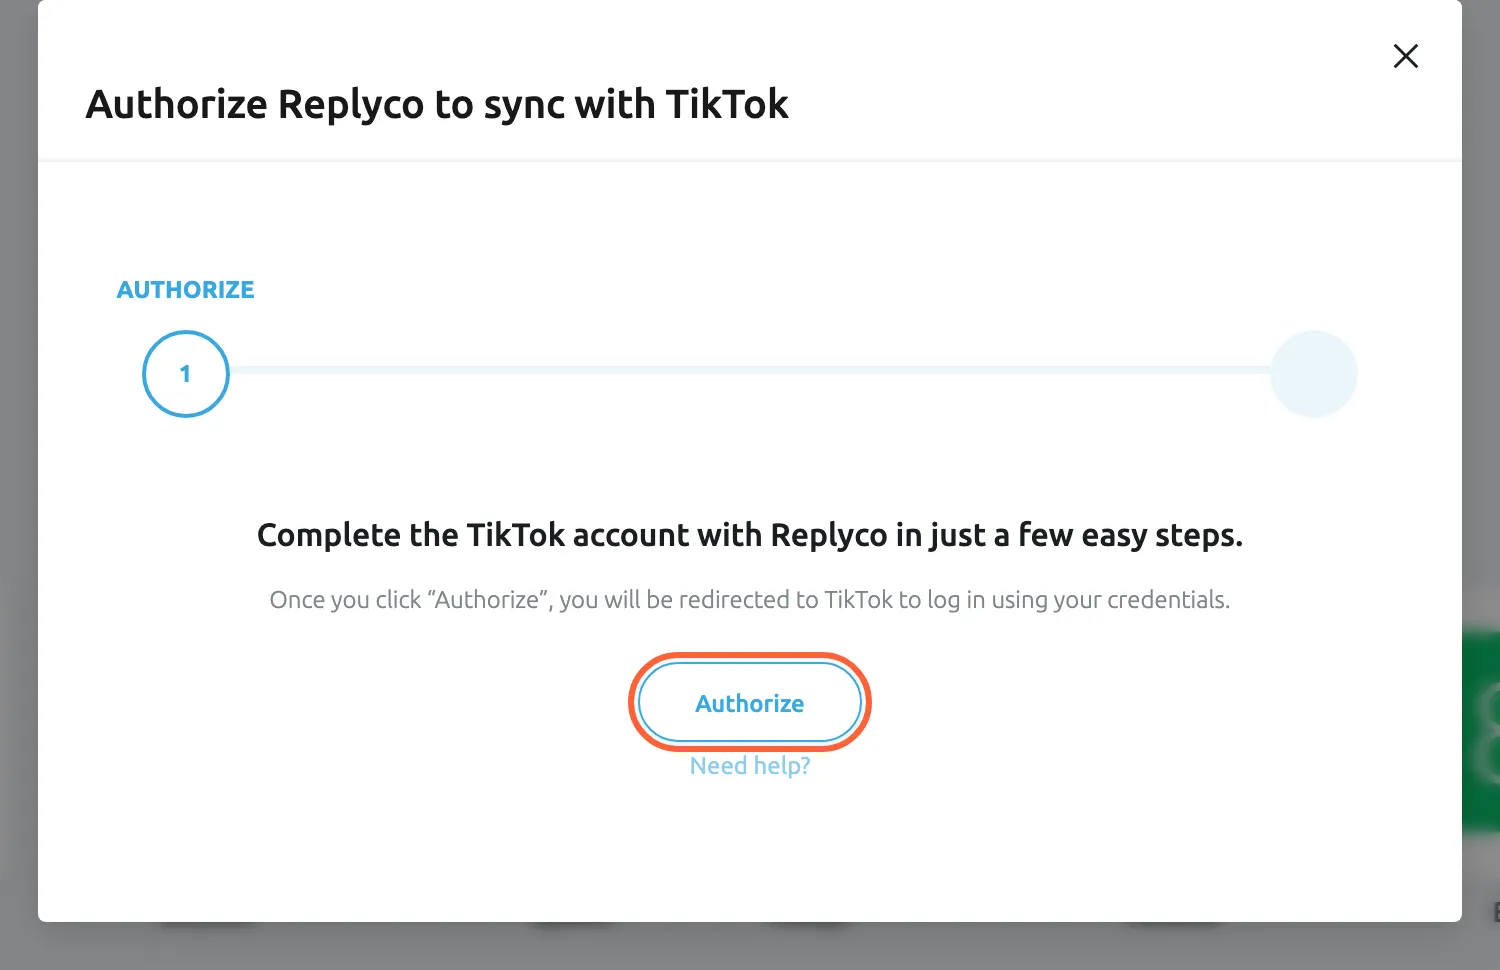
Authorize opens TikTok Shop's authorisation page in a new tab. What this screenshot shows
- Screen
- Authorize Replyco to sync with {{name}} (/integrations/add)
- Highlighted
- button “Authorize”, dialog-centre, enabled. opens TikTok Shop's seller authorisation in a new tab
- Also visible
- step AUTHORIZE of two; Need help? link
- Purpose
- start the TikTok sign-in
-
In the TikTok Shop tab, sign in with your seller account and follow TikTok Shop’s steps to authorise Replyco for your shops. First choose your account type and the region your shop is registered in, and select “Next”.
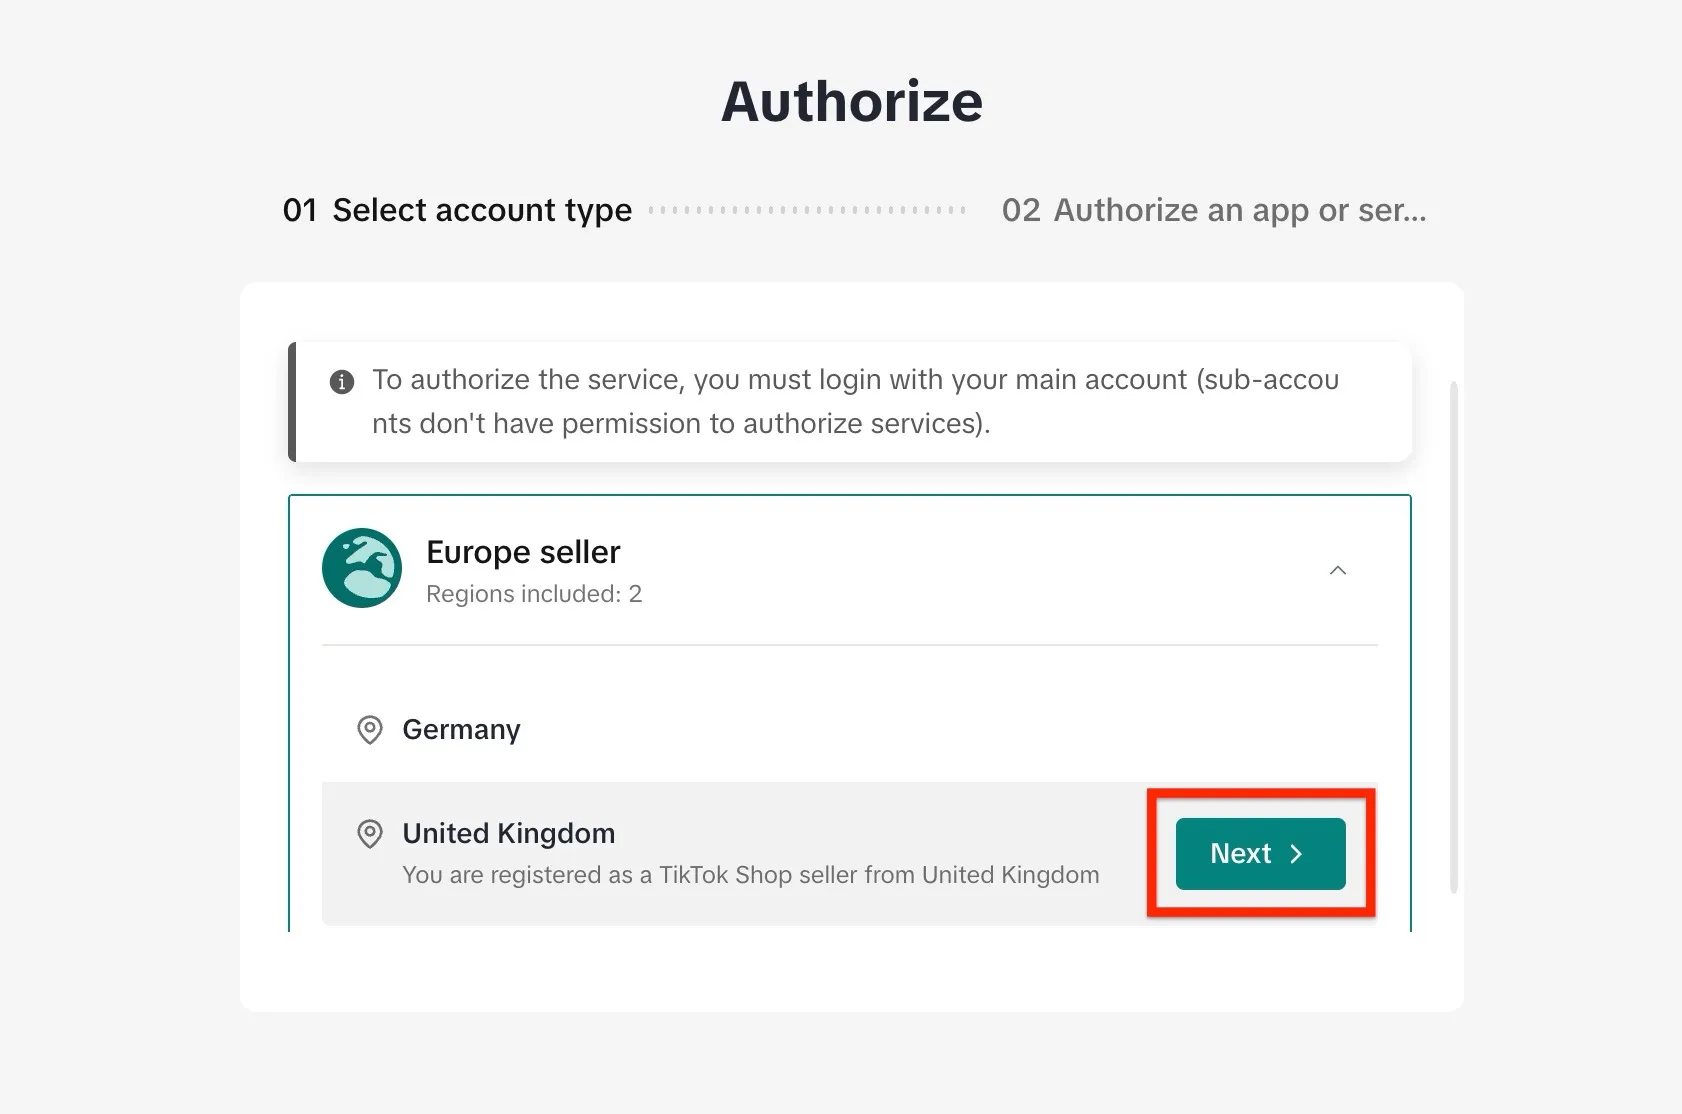
Choose the region your TikTok Shop is registered in and select "Next". What this screenshot shows
- Screen
- ()
- Highlighted
- “”, , .
- Also visible
- main-account notice; Europe seller with Germany and United Kingdom; Next, framed in red
- Purpose
The next page is called “Install”, or “Renew” when you connect again. Fill in the form, with the shop and your contact email; the telephone number is optional. Then select “Confirm to install”.
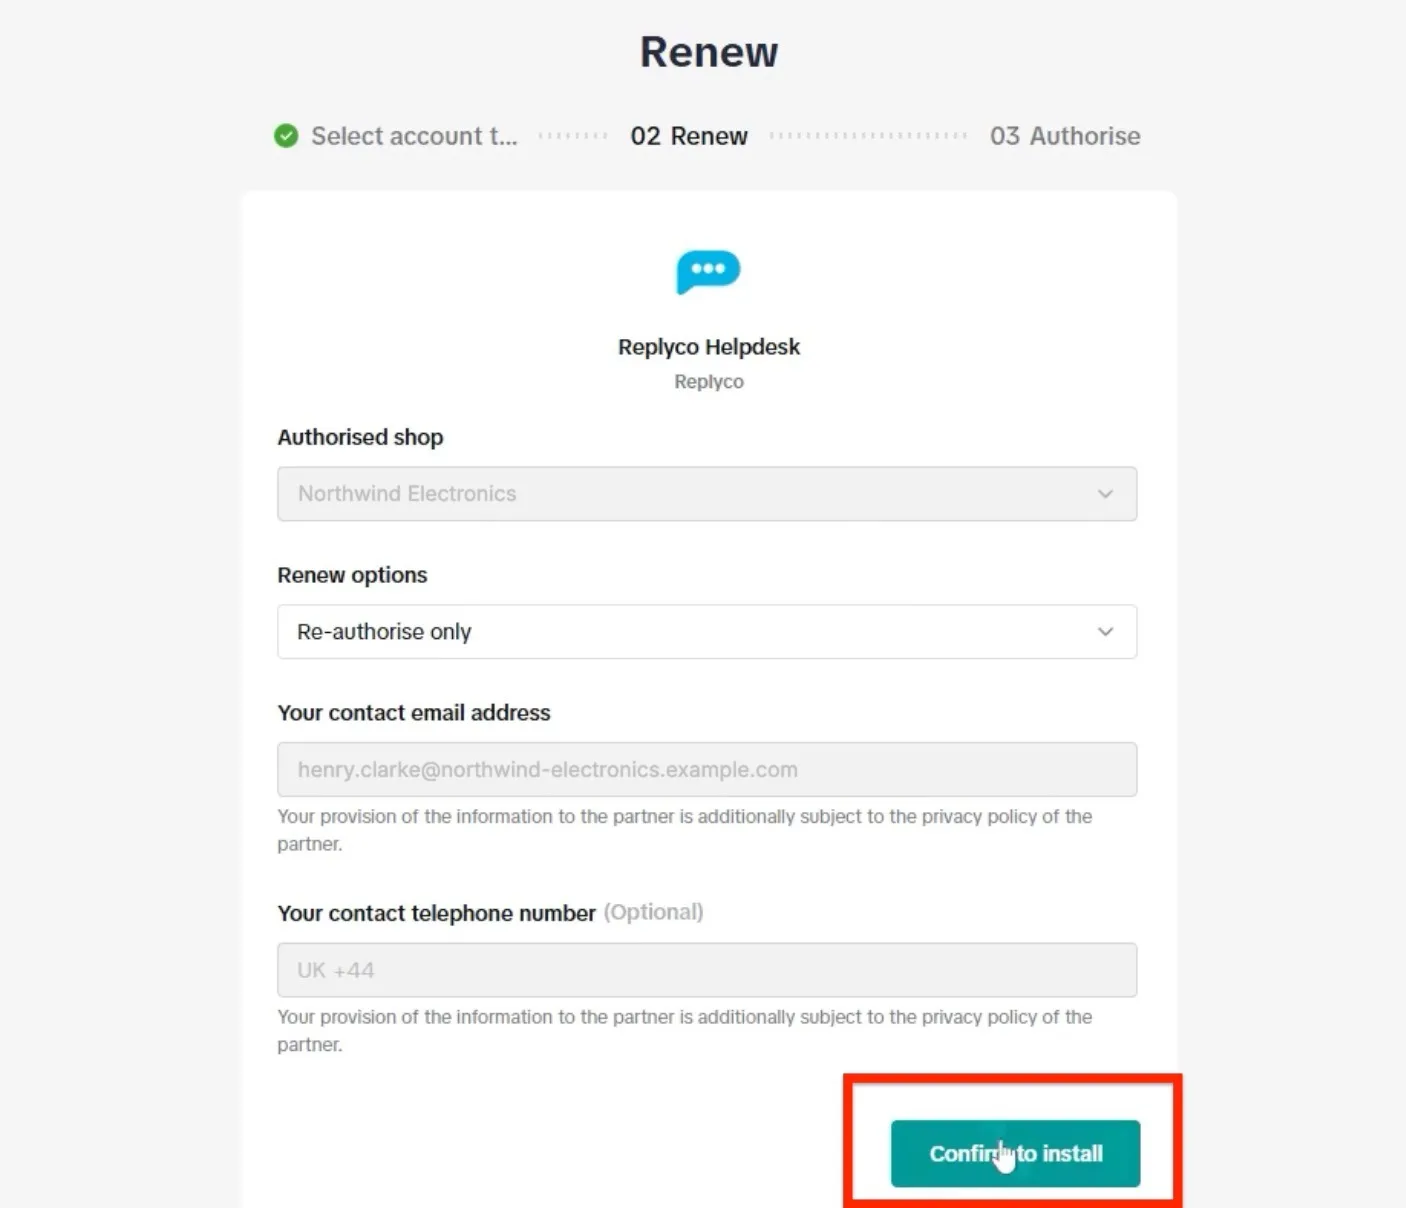
Check the shop and your contact details, then select "Confirm to install". What this screenshot shows
- Screen
- ()
- Highlighted
- “”, , .
- Also visible
- Replyco Helpdesk; Authorised shop; Renew options: Re-authorise only; contact email and optional telephone number; Confirm to install, framed in red
- Purpose
Tick the acknowledgement under the list of conditions and select “Authorise”.
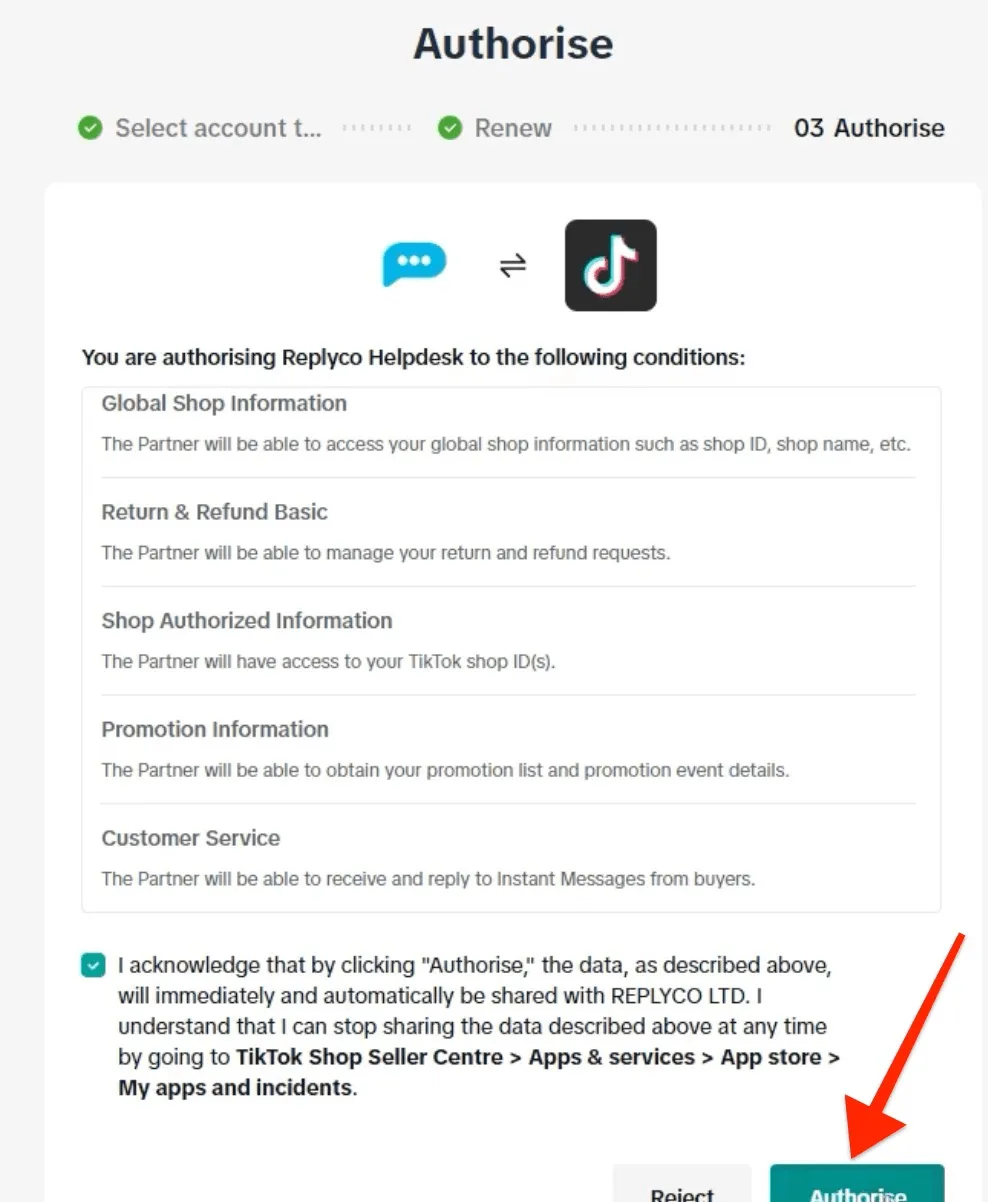
Tick the acknowledgement and select "Authorise". What this screenshot shows
- Screen
- ()
- Highlighted
- “”, , .
- Also visible
- list of conditions, including Customer Service; acknowledgement, ticked; Reject; Authorise, with an arrow
- Purpose
TikTok Shop shows “Authorised” and returns you to Replyco after a few seconds.
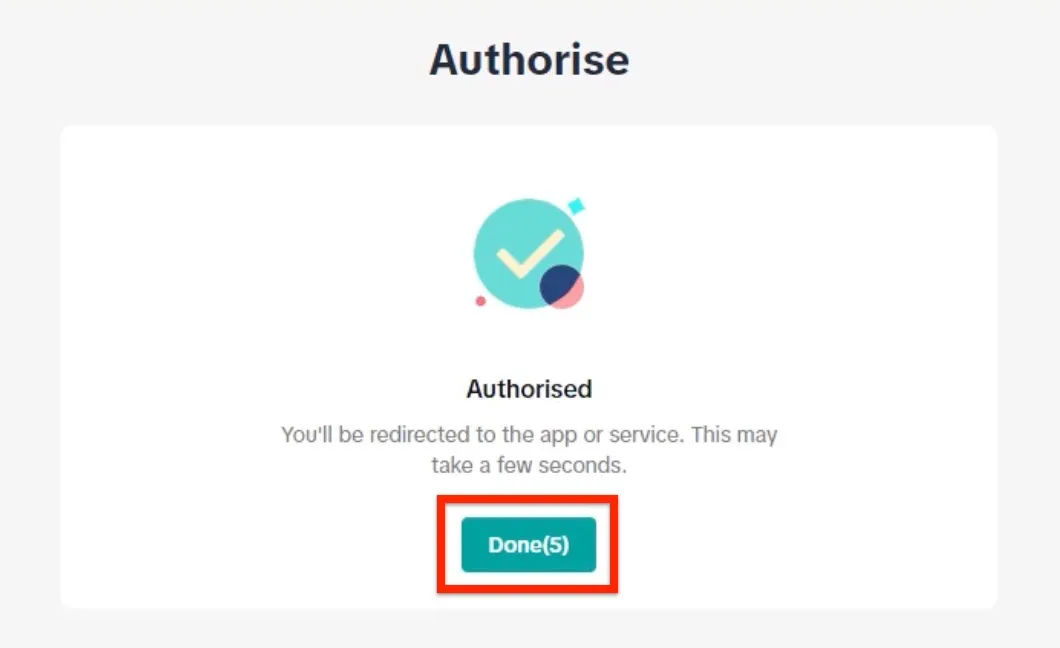
TikTok Shop confirms the authorisation and returns you to Replyco after a few seconds. What this screenshot shows
- Screen
- ()
- Highlighted
- “”, , .
- Also visible
- Authorised; You'll be redirected to the app or service.; Done(5), framed in red
- Purpose
-
TikTok Shop returns you to Replyco in the same tab, which shows Validating TikTok account... and Please do not leave the page until the validation and data storage is complete...almost there. Stay on the page until it finishes: if you try to leave, Replyco asks Are you sure you want to leave this page? You have some unsaved changes. Replyco saves one account for each shop, confirms with Account successfully saved. and opens the home page.
-
In the tab you started from, select Finish to close the dialog.
What happens next
Section titled “What happens next”Each shop appears on AdminAccounts as its own account, named after the shop; to check it or rename it, see Accounts.
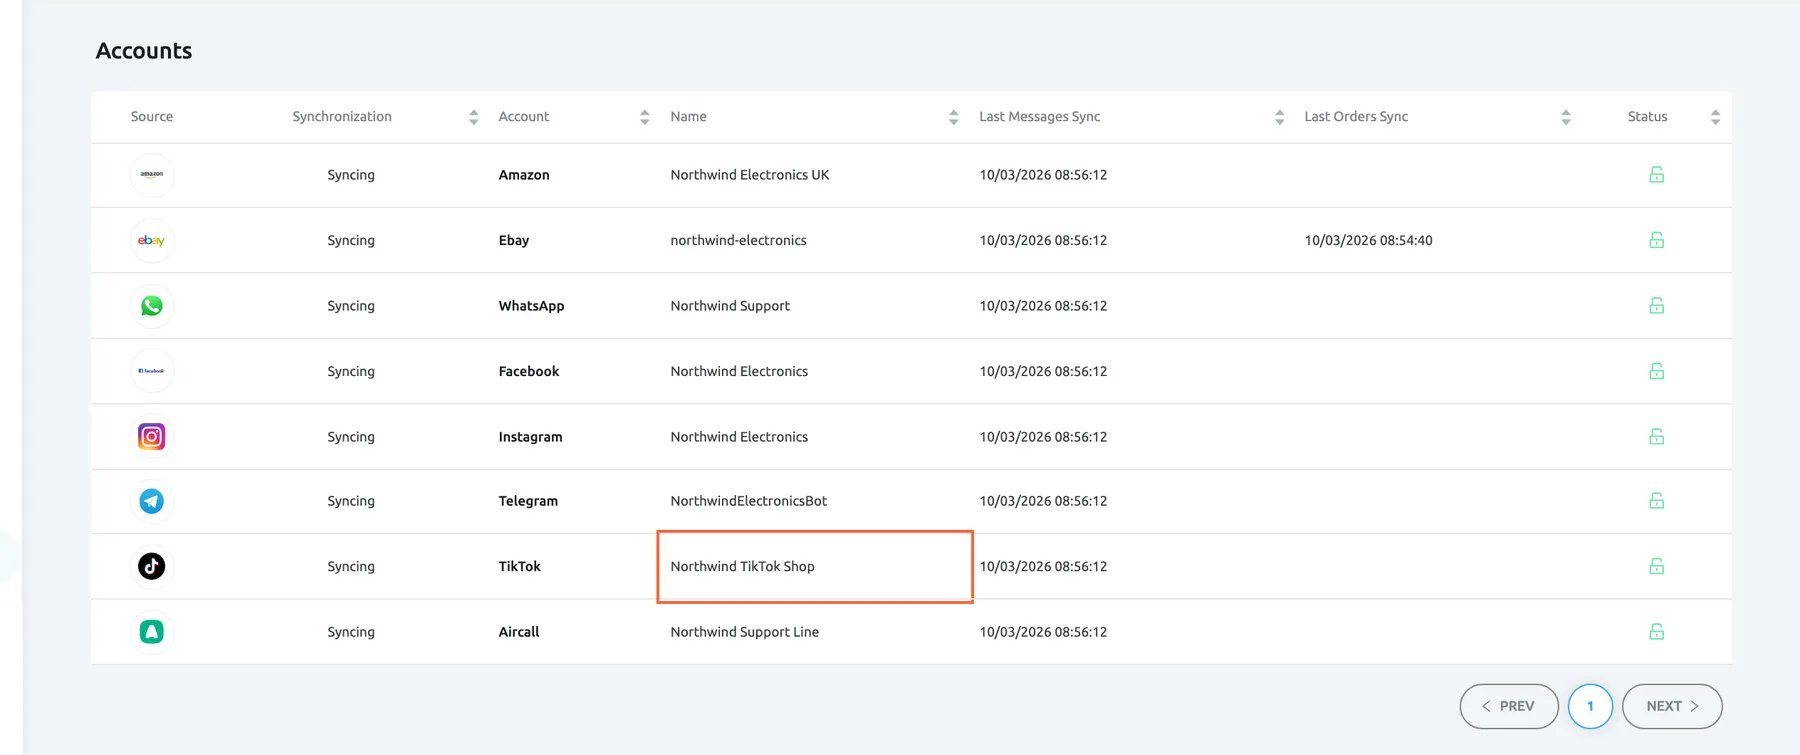
What this screenshot shows
- Screen
- Accounts (/integrations)
- Highlighted
- cell “”, table-seventh-row, enabled. opens the account's details
- Also visible
- 8 accounts, all Syncing, green open locks; TikTok row Northwind TikTok Shop
- Purpose
- check that TikTok Shop was connected
New buyer messages reach Replyco as they arrive and open or continue a chat under ChatsOpen. Opening that list also fetches conversations from TikTok Shop: the first time after you connect, Replyco fetches the conversations with a message from the last two days, so older conversations stay in TikTok Shop. See Chat list and conversations. Every user of your company gets access to the new accounts, so their chats appear for everyone with the Chats permission; to decide who is responsible for them, see Invite users and set what they can do.
Replyco sets no time limit for TikTok Shop replies. You can delete your team’s messages but not edit them: the right-click menu offers Delete on TikTok Shop chats, not Edit, and a deleted message is removed only in Replyco; see Answer a chat. To greet TikTok Shop buyers automatically, see Auto-responses for chats.
If something goes wrong
Section titled “If something goes wrong”| Symptom | Check | Fix |
|---|---|---|
| TikTok Shop does not let you authorise Replyco | Did you sign in with a sub-account? | Sign in with the main account of your TikTok Shop seller account and start again from the TikTok tile. |
| TikTok Shop returned you to the home page and no account was added | You cancelled in TikTok Shop, or the authorisation did not finish. | Start again from the TikTok tile and complete TikTok Shop’s steps. |
| A TikTok Shop account no longer brings in chats | TikTok Shop no longer accepts Replyco’s access, for example after the authorisation was revoked. | Connect again from the TikTok tile with the same seller account. Replyco renews the access of the shops that are already connected instead of adding them a second time. |
| “You reached your current plan maximum integrations count. Contact support for more info.” | Your plan has no free account; + Add Account is then also missing from the top bar. | Delete an account you no longer use, or change your plan on AdminBilling. |