

Set up Replyco for your team
Before your team answers its first customer in Replyco, an administrator prepares the ground once: the accounts customers write through, the colleagues who answer and what each of them may do, the labels and priorities that sort the work, the templates, rules and auto-responses that save typing, the hours your team works and the AI features you want. This guide takes you through those six jobs in the order that works best, with each step pointing to the guide that explains the screen in full. When you are done, new customer messages arrive as tickets that are already sorted, prioritised and, where you want it, answered.
Before you start
Section titled “Before you start”| You need | Where it lives |
|---|---|
| The Admin permission with Edit rights, which AdminCompany Settings and ToolsAI Settings need | AdminUsers; see User permissions and roles |
| A plan with room for the accounts you want to connect | AdminBilling; see Billing |
| Sign-in details for each channel: marketplace seller accounts, webstore admin, mailboxes, messengers | The channels themselves; see Accounts and integrations |
| The e-mail addresses of the colleagues you invite | Your team |
| Your working days, hours and holidays | Your team’s rota |
Availability: every plan includes every step of this guide, inviting colleagues and choosing their role and access rights on the Users screen included. During a trial every feature is switched on. Companies on an older plan may not have every part, such as the Users screen, priorities with response deadlines, auto-responses or templates limited to one account; see What each plan includes.
-
Connect your accounts.
Select + Add Account in the top bar. The page Add Account lists every marketplace, webstore, mailbox, order management system and messenger Replyco connects to; a small number on a tile counts the accounts of that kind you already have. Select a tile and follow the steps of that channel’s guide, for example Connect Amazon; all channels are listed in Add Account.
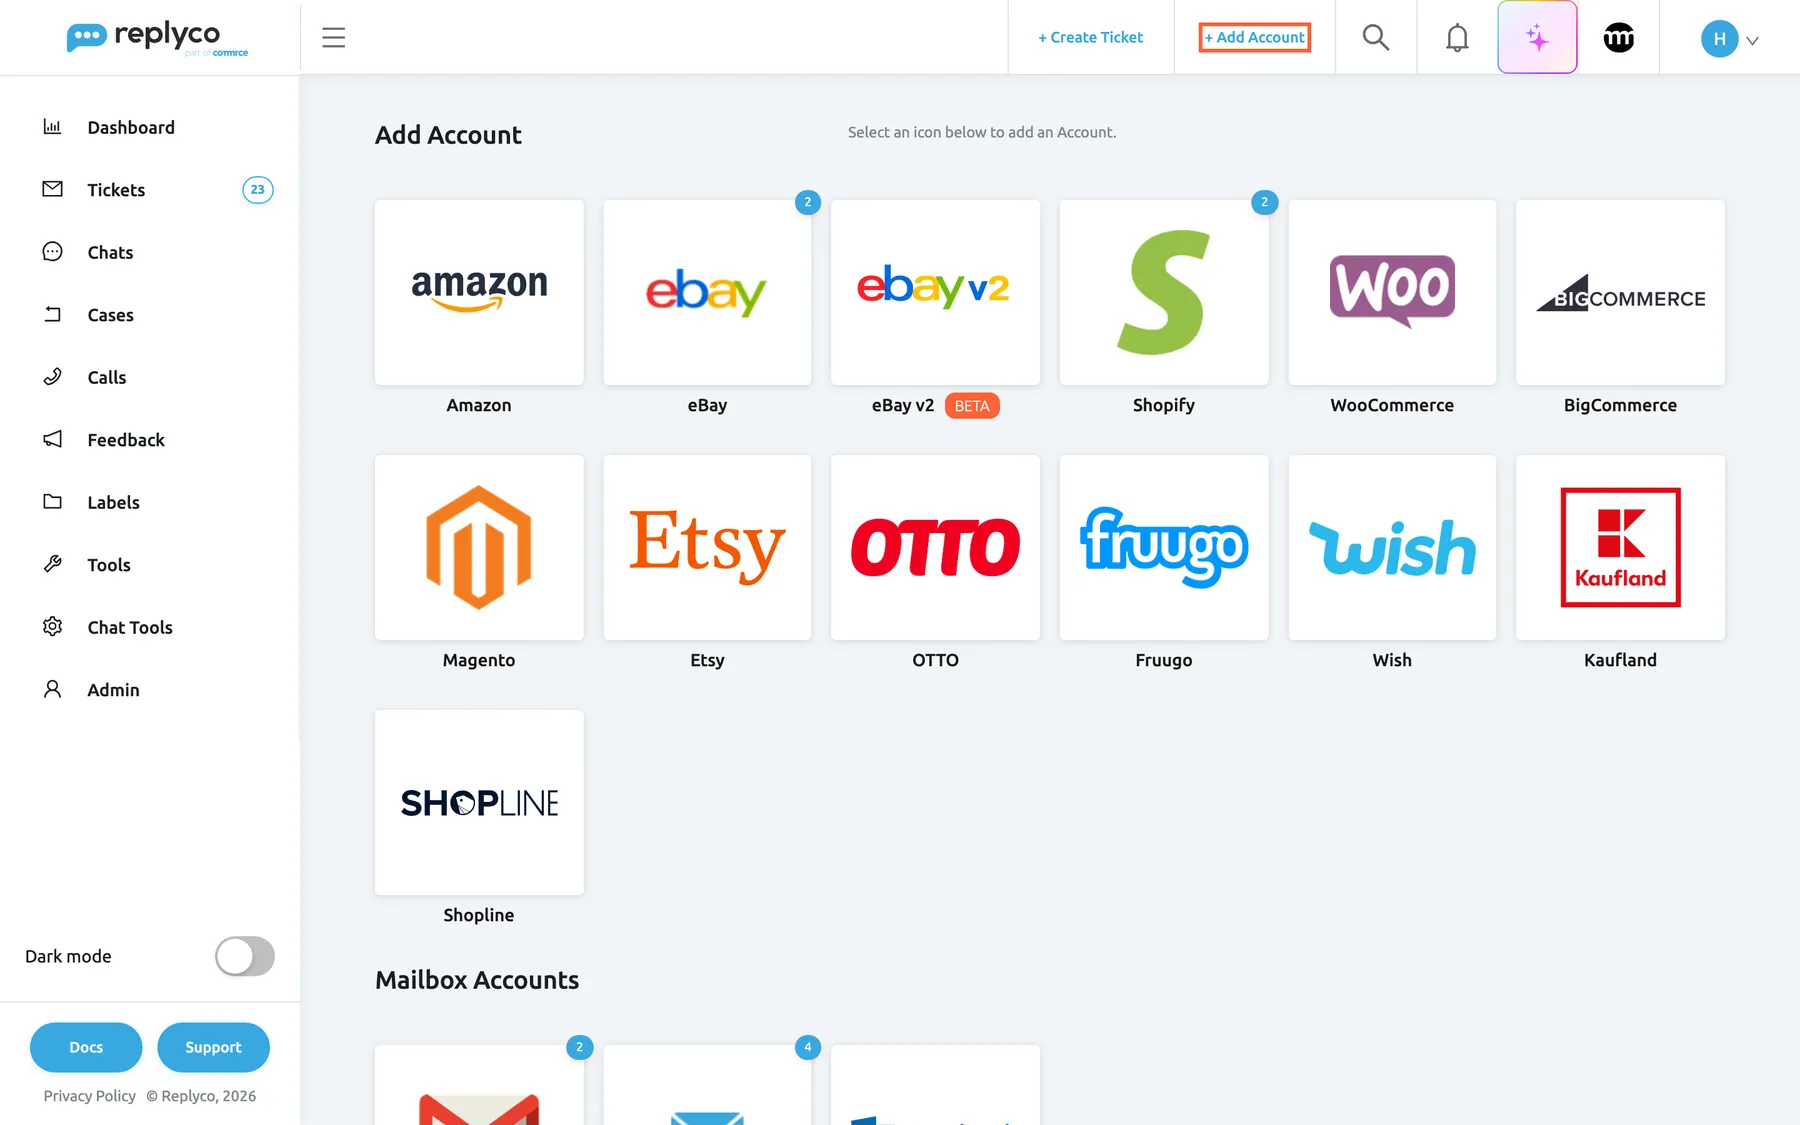
Start with + Add Account in the top bar and pick the channel your customers write through most. What this screenshot shows
- Screen
- Add Account (/integrations/add)
- Highlighted
- link “+ Add Account”, top-bar, current page. opens the Add Account page
- Also visible
- marketplace tiles with counts of connected accounts; Mailbox Accounts section below
- Purpose
- entry point for connecting accounts
Connect every channel you answer customers on before you write templates and rules: both can be limited to accounts, and an account that is not connected yet cannot be chosen. Replyco brings in recent messages and orders, not your whole archive; how far back it goes depends on the channel. Amazon, for example, sends buyer messages from the moment you set up the Replyco address, and Replyco imports orders from the last two days. When your plan’s accounts are used up, + Add Account disappears from the top bar.
-
Invite your users and set what they can do.
Open AdminUsers and select Invite User. Enter the colleague’s name and e-mail address, choose a User Role, and select Send Invitation. Replyco e-mails them an invitation to finish their registration and shows a link you can copy and send yourself.
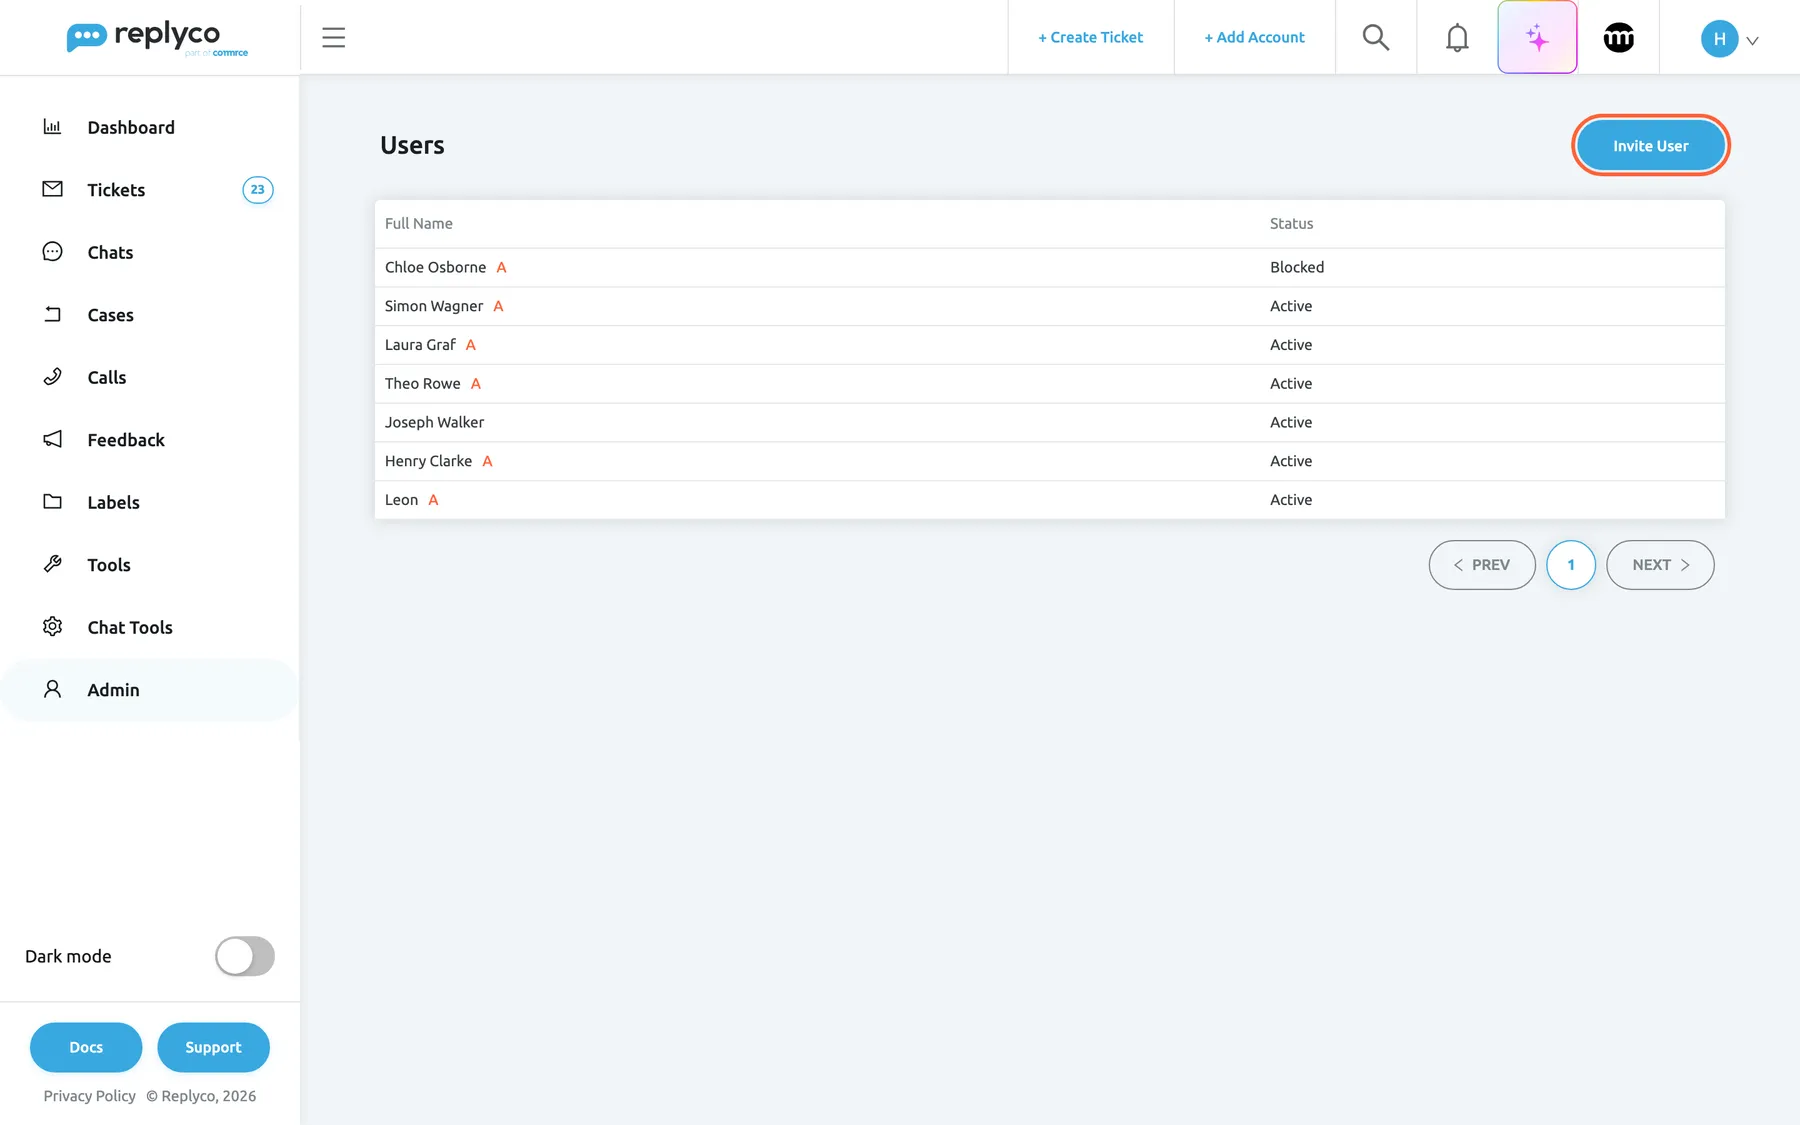
Invite each colleague from Admin › Users; their role decides what they can open. What this screenshot shows
- Screen
- Users (/users)
- Highlighted
- button “Invite User”, header-right, enabled. opens the invitation form
- Also visible
- seven users with status; red A marking administrators; pagination
- Purpose
- entry point for inviting users and setting permissions
The roles Admin, Moderator and User come with ready-made access; for anything in between, open the user and change their Access Rights: which ticket lists, dashboards, labels, accounts and tools they see. The invitation form preselects the User role, which suits agents. Every new user must use two-factor authentication, on every plan: each colleague sets it up while finishing their registration. If your subscription is priced per user, Replyco warns you that the new user changes the price before it sends the invitation. For every field and permission, see Invite users and set what they can do and Users.
-
Create your labels and priorities.
Labels group tickets by topic, such as Pre-sale, Delivery or Wholesale. Open ToolsLabels, select Create New, enter a name and pick a colour. Each label gets its own entry and counter in the sidebar, rules can file tickets into it, and you decide per user who sees it. See Labels.
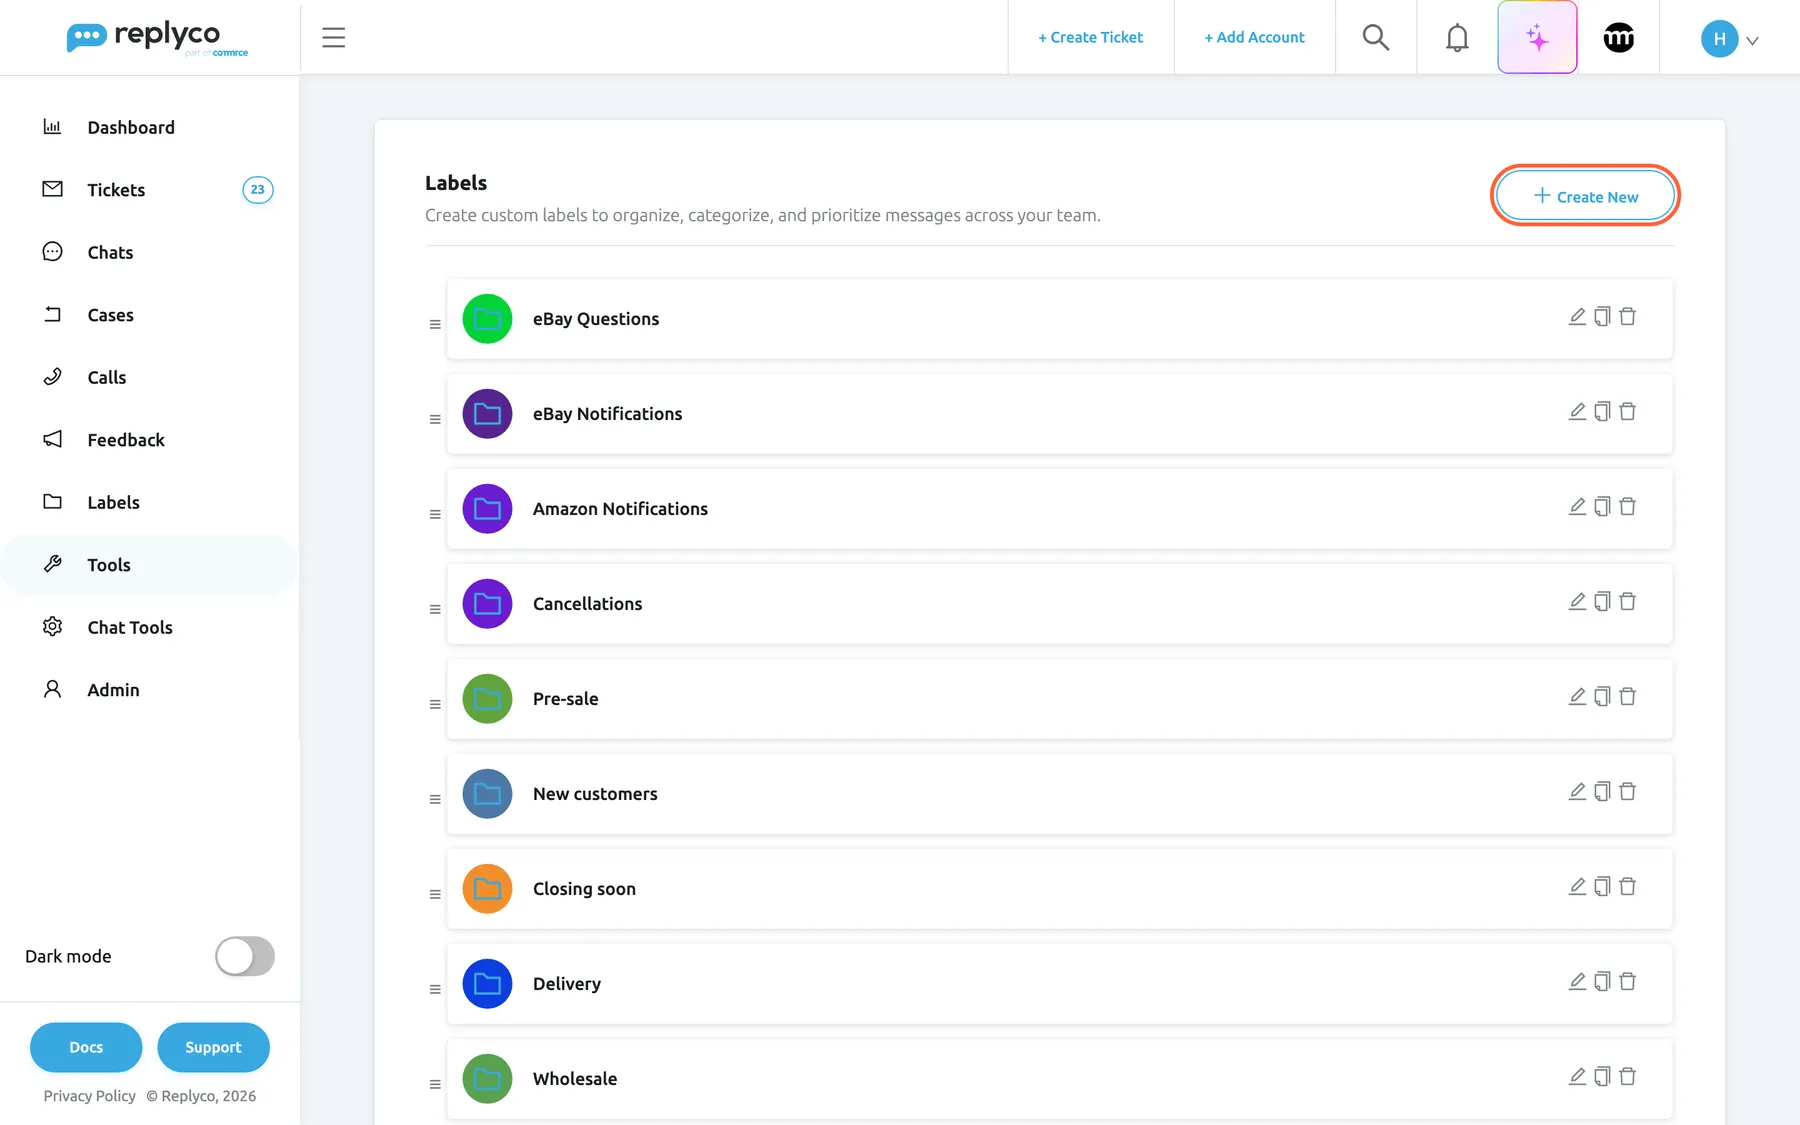
Labels group tickets by topic; Create New adds one with a name and a colour. What this screenshot shows
- Screen
- Labels (/folders)
- Highlighted
- button “Create New”, header-right, enabled. opens the new label form
- Also visible
- label list with colours and edit, copy and delete icons; drag handles for the order
- Purpose
- entry point for labels
Priorities say how urgent a ticket is and how soon it must be answered and resolved. Open AdminCompany Settings, select the tab Priorities & SLA and select Create New for each priority, from the most urgent down. See Priorities & SLA and, for how deadlines are counted, Ticket priorities and SLA.
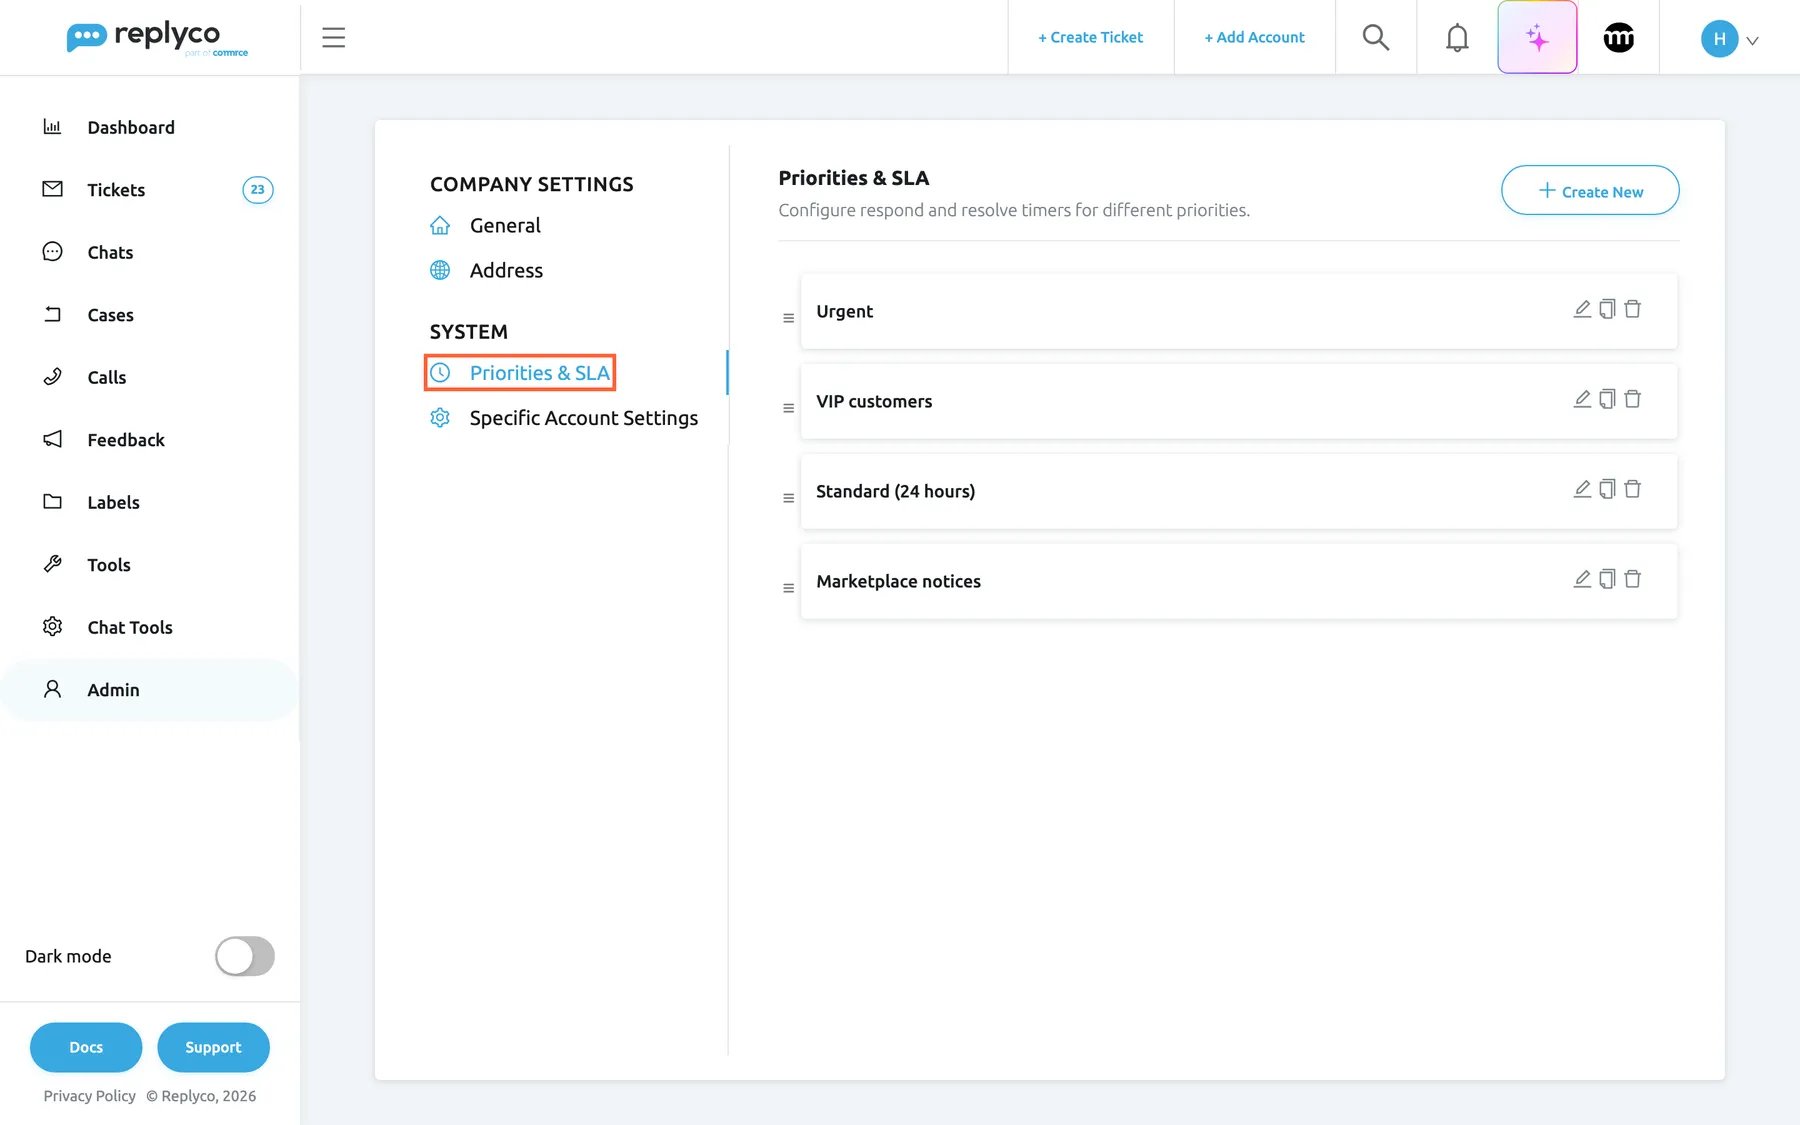
Priorities with response and resolution targets live on their own tab of Company Settings. What this screenshot shows
- Screen
- Priorities & SLA (/company?tab=priorities)
- Highlighted
- tab “Priorities & SLA”, left-tab-list, selected. shows the priorities
- Also visible
- four priorities in urgency order; Create New button
- Purpose
- entry point for priorities
-
Prepare templates, rules and auto-responses.
All three live on ToolsAutomation, one tab each. Start with Templates: answers to the questions you get every day, with placeholders such as the customer’s first name that Replyco fills in; see Reply templates and the Templates screen. Then add Rules that act on incoming tickets, for example a ticket from your Amazon account → Allocate User Laura or a subject containing “delivery” → Allocate into Label Delivery; see Rules for incoming tickets.
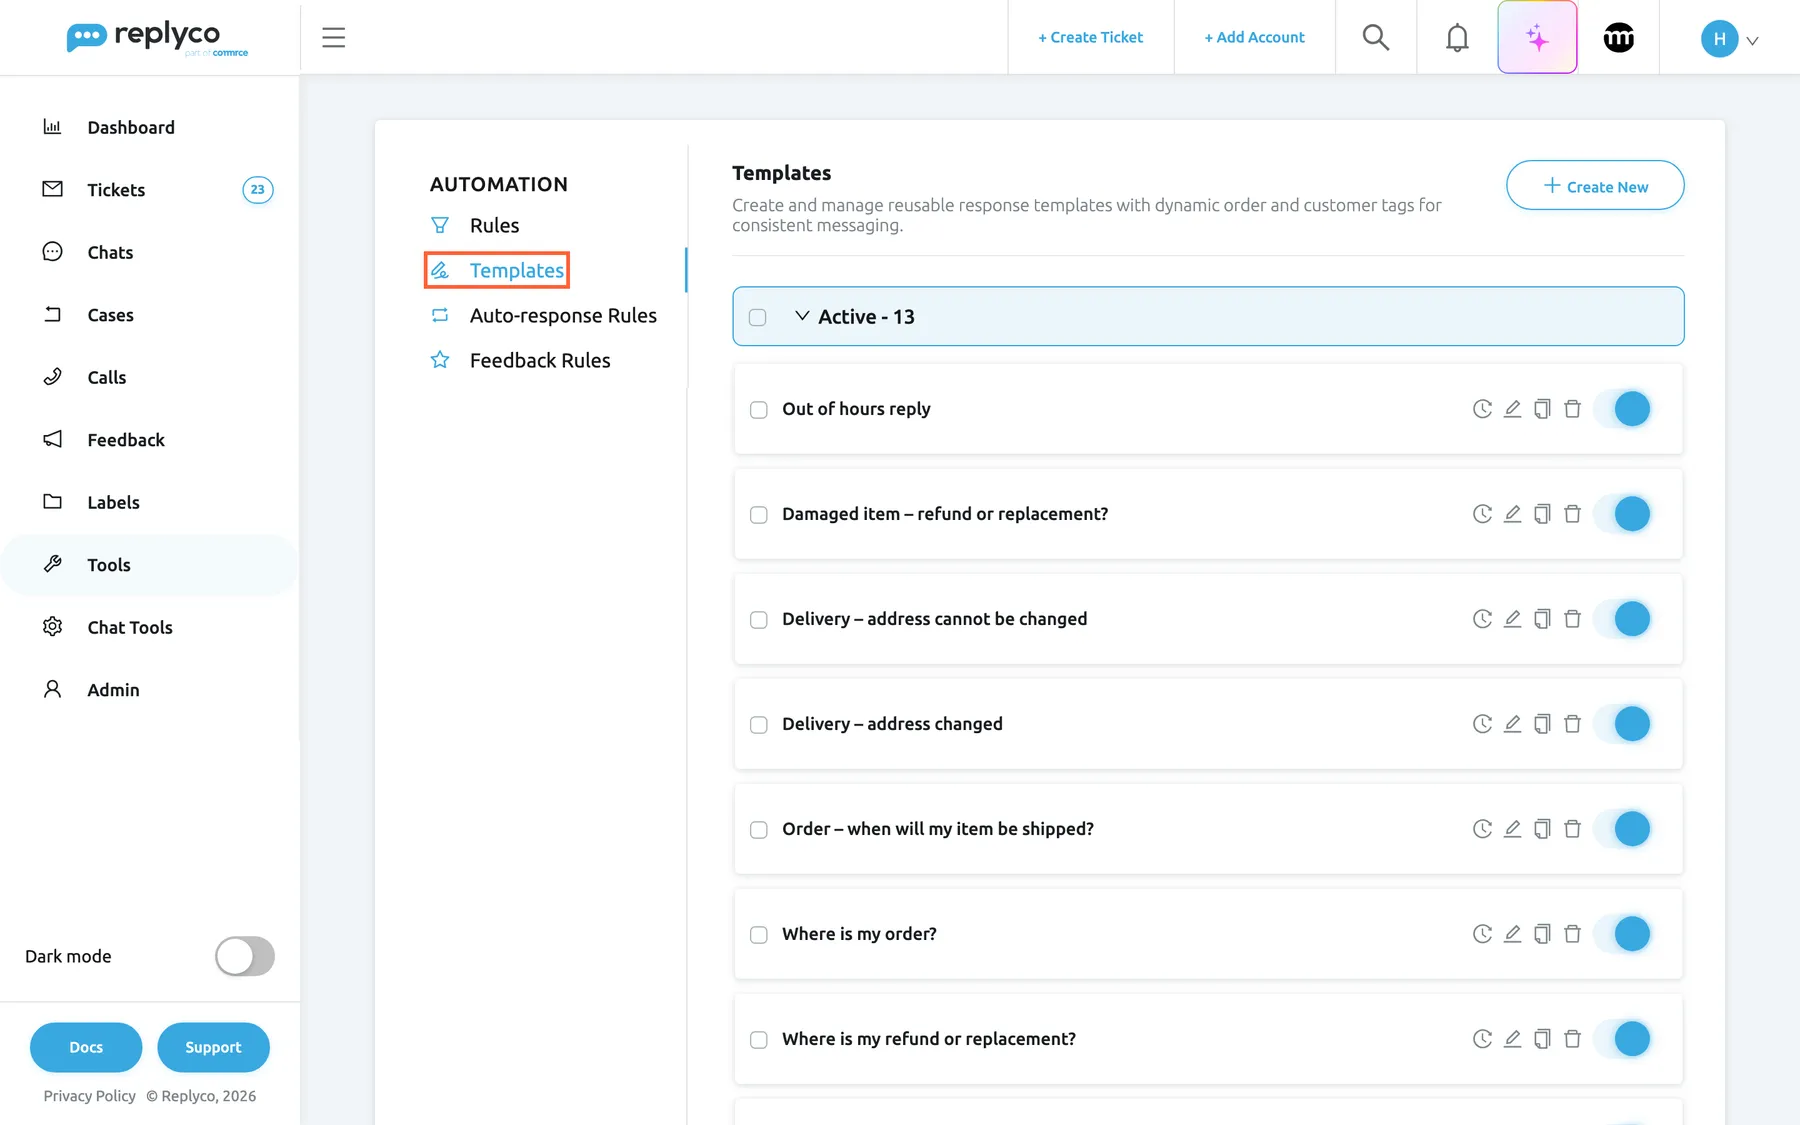
Templates, rules and auto-responses share the Automation screen, one tab each. What this screenshot shows
- Screen
- Automation (/tickets-automation?tab=templates)
- Highlighted
- tab “Templates”, left-tab-list, selected. shows the templates
- Also visible
- Rules, Auto-response Rules and Feedback Rules tabs; template list with switches; Create New button
- Purpose
- entry point for templates, rules and auto-responses
Finish with Auto-response Rules. An auto-response always sends one of your templates, chosen under Template to Send, so it comes after the templates. A common first one confirms receipt outside your working hours with Send Outside Working hours of Company; see Auto-responses for tickets.
-
Set your working time.
Open AdminCompany Settings and scroll to the Working Time card on the General tab. Select your working days, set the daily start and end time, add your holidays and select Save. A new company works Monday to Friday, 09:00–18:00.
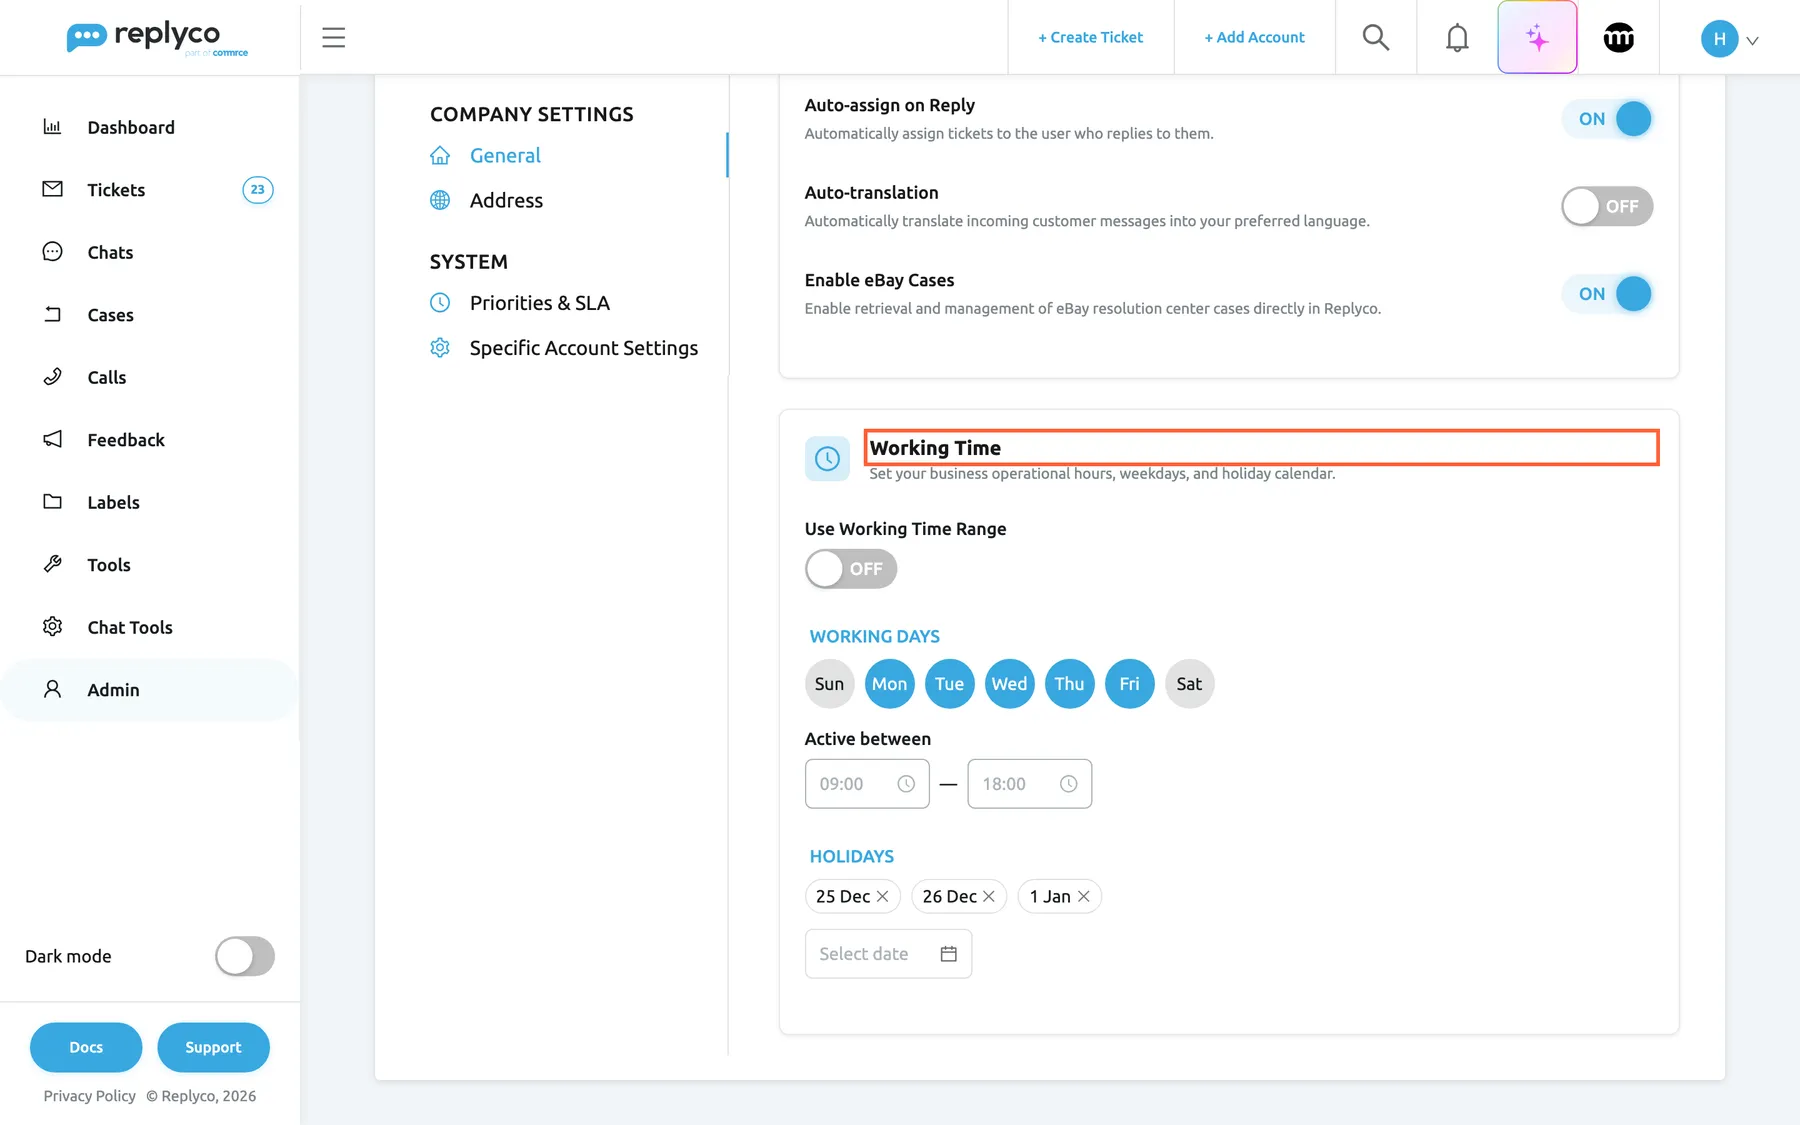
Set your working days, hours and holidays once; deadlines and out-of-hours replies follow them. What this screenshot shows
- Screen
- General (/company)
- Highlighted
- heading “Working Time”, working-time-card, shown. none; the card with days
- Also visible
- Monday to Friday selected; 09:00 to 18:00; three holidays with crosses; General card switches above
- Purpose
- entry point for working time
Working time decides when response deadlines run for priorities counted in working hours, when out-of-hours auto-responses are sent and when a live chat shows you as available. See Set your working days, hours and holidays and Working time.
-
Choose your AI settings.
Open ToolsAI Settings. The General tab switches the company’s AI features on or off, among them AI Categories, Thread Summary and Message Tone Analysis; select Save after a change. The Categories tab holds the categories the AI sorts messages into, and AI Draft Settings appears when Replyco has switched AI drafts on for your company.
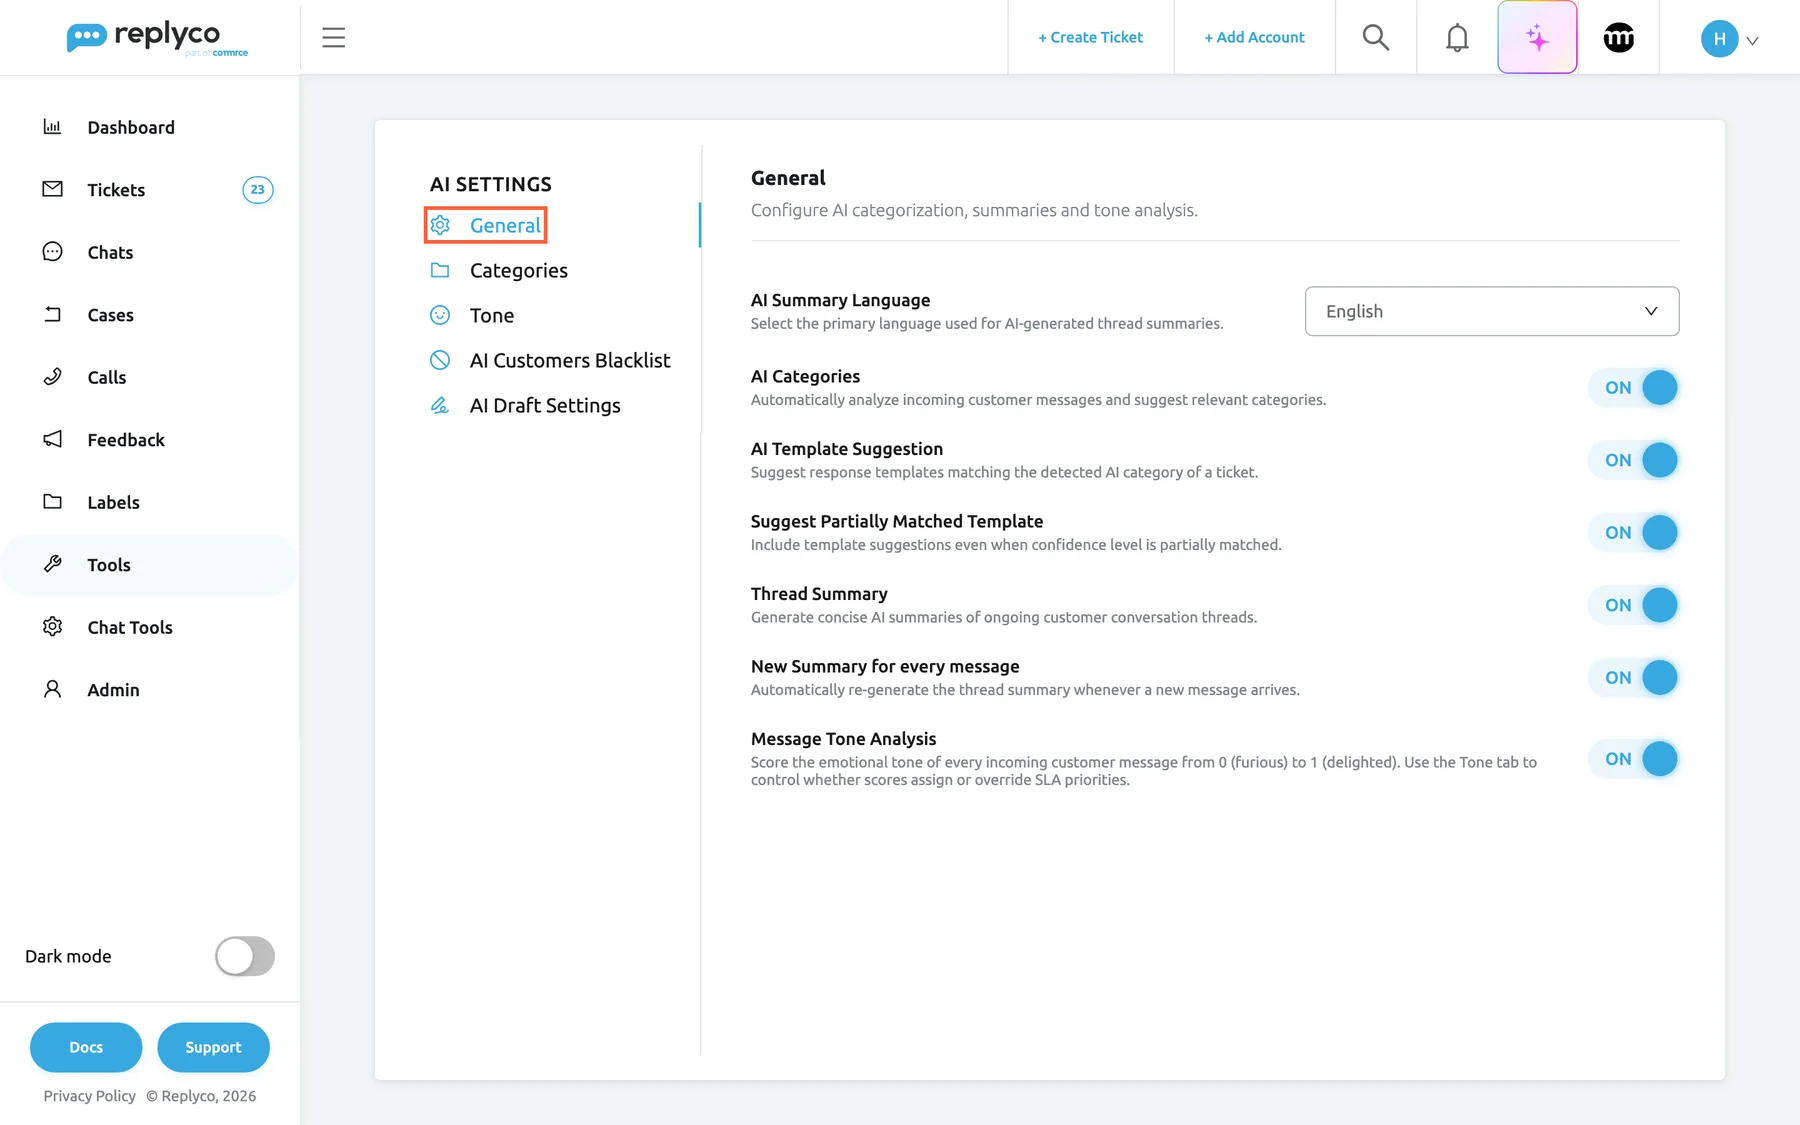
The General tab of AI Settings switches Replyco's AI features on or off for the whole company. What this screenshot shows
- Screen
- AI Settings (/aiSettings)
- Highlighted
- tab “General”, left-tab-list, selected. shows the company-wide AI switches
- Also visible
- AI Summary Language English; six switches on; Categories, Tone, Blacklist and AI Draft Settings tabs
- Purpose
- entry point for AI settings
For what each feature does and costs, see AI categories, AI summaries, Message tone analysis and AI drafts; for every switch on the screen, see AI Settings.
-
(Optional) Ask each colleague to finish their own settings.
Signatures, notifications and the start screen are set by each user for themselves in Account Settings, from the user menu under their avatar; the same place lets them reset their two-factor authentication. See Account Signatures, Notifications, Account Settings and Two-factor authentication.
What happens next
Section titled “What happens next”New customer messages from your connected accounts arrive as tickets in TicketsNot Resolved. Your rules act on each new ticket as it arrives, so it already has its label, priority or assignee; auto-responses go out when their conditions match; and response deadlines count down in your working time. Rules and auto-responses act on messages that arrive after you save them. To apply your rules to tickets you already have, tick those tickets in a ticket list and select Run Rules; see Rules for incoming tickets. Auto-responses go out only for new messages.
To check that everything works, wait for the next customer message on each account, or ask a colleague to send one, and open the ticket: it shows the account it came from, the label and priority your rules set, and, if an auto-response applied, the reply Replyco sent. Each invited colleague appears in AdminUsers as soon as you send the invitation, and can sign in once they have finished their registration. To take your team through the rest of the screen, see The Replyco screen.
Options
Section titled “Options”| Choice | When to pick it | Effect |
|---|---|---|
| The ready-made roles Admin, Moderator and User | Most team members fit one of them | Each gets the role’s access at once; you can still change one user’s access rights later |
| Access rights per user | Some colleagues should see only certain ticket lists, labels or accounts | Only what you tick is shown to that user; see Invite users and set what they can do |
| Priorities counted in working hours | Your team works office hours and customers accept replies the next working day | Deadlines pause outside your working time; see Ticket priorities and SLA |
| Priorities counted in calendar hours | You promise replies within a set time, nights and weekends included | Deadlines run day and night |
If something goes wrong
Section titled “If something goes wrong”| Symptom | Check | Fix |
|---|---|---|
| + Add Account is missing from the top bar | Do you have the Admin permission? Has your company connected as many accounts as the plan includes? | Ask an admin, or see Billing for more accounts. |
| The invited colleague did not get the e-mail | Is the e-mail address right? Is it in their spam folder? | Copy the registration link Replyco shows after sending, and send it to them yourself. |
| There is no way to invite colleagues, choose a role or set access rights | Do you have the Admin permission? Users is in the Admin menu on every plan; companies on an older plan may not have it. | Ask an admin, or see What each plan includes and Billing. |
| The tabs Priorities & SLA or Auto-response Rules are missing | Every plan includes both; companies on an older plan may not have them. | See What each plan includes and Billing. |
| A rule did not act on an older ticket | Rules act on messages as they arrive, not on the tickets you already had when you saved the rule. | Tick the tickets in a ticket list and select Run Rules; see Rules for incoming tickets. |
| Company Settings is missing under Admin, or AI Settings under Tools | Do you have the Admin permission with Edit rights? Without them, both menu items are hidden and their links open your start screen. AI Settings also needs Replyco AI, which every plan includes; companies on an older plan may not have it. | Ask an admin to give you Edit rights; see User permissions and roles and What each plan includes. |